WPML provides an easy-to-use language switcher but sometimes, you don’t want it to appear on all pages. Learn how to show or hide it only on specific pages.
You can easily do this using a few lines of CSS.
Displaying the Language Switcher Only on Specific Pages
Step 1: Hiding the Language Switcher on All Pages
First, you need to check which class our language switcher is using.
You can check this using the browser’s Developer Tools:
- Visit your site on the front-end and click the F12 button on your keyboard.
- Use the “inspect” tool to select the language switcher and its HTML markup will appear.
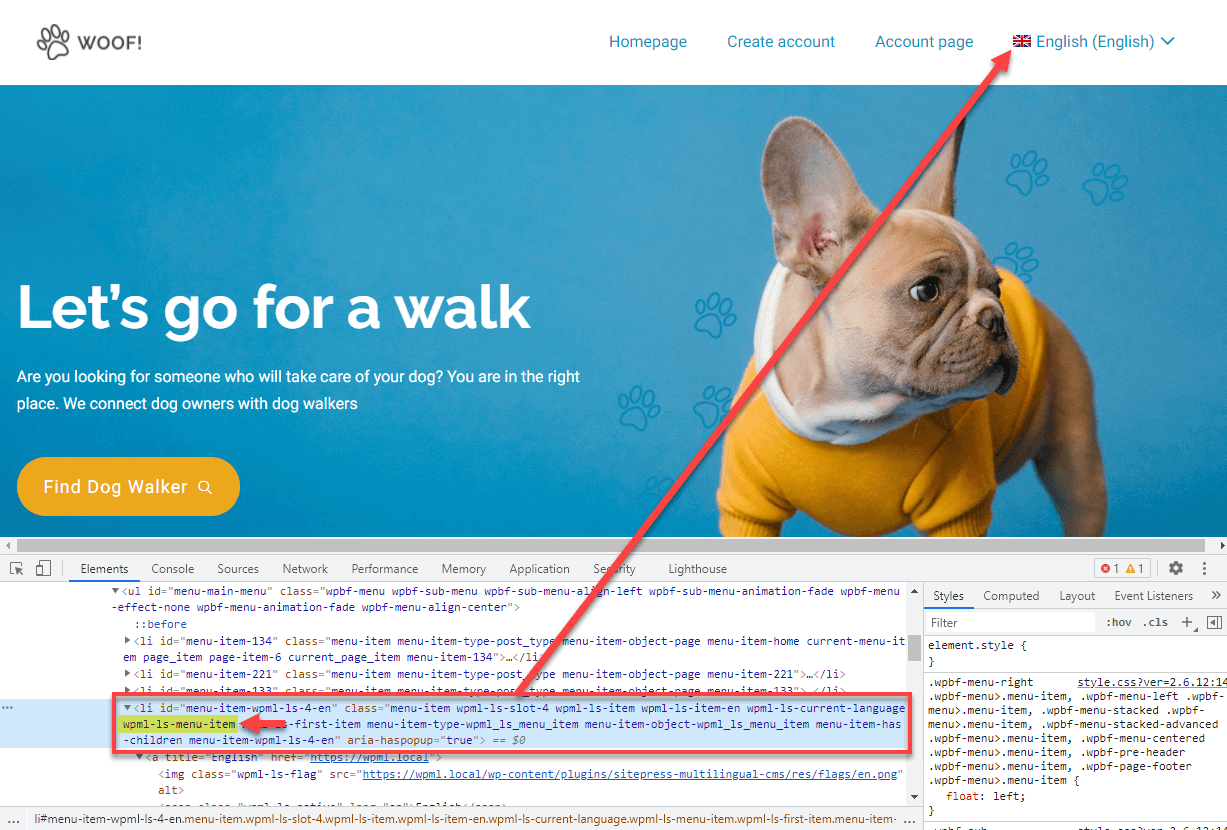
Here are two common classes for a language switcher:
- wpml-ls-menu-item class when switcher appears in a menu
- wpml-ls class when switcher appears in the footer
Once you know the correct class go to the Appearance → Customize page, click Additional CSS, and add the following CSS to your website.
/*Hide menu Language Switcher*/
.wpml-ls-menu-item {
	visibility: hidden !important;
}

/*Hide footer Language Switcher*/
.wpml-ls {
	visibility: hidden  !important;
}
This will hide the language switcher on all pages.
Alternatively, you can add these styling rules to your theme’s style.css file but make sure to use a child theme. Otherwise, your custom styling will be lost when you update the theme.
For detailed information about language switcher CSS classes, visit our page about CSS styling for language switchers.
Step 2: Displaying the Language Switcher on a Specific Page
In the next step, you need to add another CSS snippet to display the language switcher only on the pages you want.
WordPress automatically adds specific classes to the body tag of each page. This allows you to target the language switcher on a specific page.
To find the class, open the page that you want to display the language switcher on the front-end. Again, use the browser inspector tool and search for the body tag.
You will see something like this:
<body class="page-template-default page page-id-2 logged-in admin-bar wp-embed-responsive is-light-theme singular has-main-navigation customize-support">
In this case, the page-id-2 class is added only to this specific page. The number represents this page’s ID and you can use it to build your snippet.
The complete snippet should look like this:
/*Hide menu Language Switcher*/
.wpml-ls-menu-item {
	visibility: hidden !important;
}

/*Hide footer Language Switcher*/
.wpml-ls {
	visibility: hidden  !important;
}

/*Display Language Switcher only in the page with ID 2*/
body.page-id-2 .wpml-ls-menu-item {
	visibility: visible !important;
}

body.page-id-2 .wpml-ls {
	visibility: visible !important;
}
Remember to replace the page-id-2 class with the class of your page.
Here are some of the specific classes that you can use:
- page-id-X: Used for pages (replace X with the ID of the page)
- postid-X: Used for posts (replace X with the ID of the post)
- home: Used for the homepage
- single-post: Used for all posts (not a specific one)
- page: Used for all pages (not a specific one)
Hiding the language switcher only in specific pages
Hiding the language switcher on specific pages is very similar to the previous steps. But instead of hiding it on all pages, you will only hide it on a specific page.
For this, you only need to get the specific class of the page, then use it to hide the language switcher of that page.
Your CSS snippet should look like this:
/*Hide Language Switcher only on the page with ID 2*/

/*Menu Language Switcher*/
body.page-id-2 .wpml-ls-menu-item {
	visibility: hidden !important;
}
/*Footer Language Switcher*/
body.page-id-2 .wpml-ls {
	visibility: hidden !important;
}
Remember to replace the page-id-2 class with your specific class.