I just had the pleasure of migrating this website from one WordPress install to the other. At first, I searched for advice on how to do this, leading me in weird directions (mostly revolving around mysql dumps).
It turns out this procedure can be much simpler than anticipated, given you’re doing things in their correct order. Here is what I did…
Some Background
I moved my site from WordPressMU to WordPress leaving the domain name intact.
This move was necessary. I was using WPMU for reasons that have long expired and the restrictions that it kept imposing were impossible for me. In addition, some plugins that I must use don’t work on WPMU.
Both sites run on the same server. Also, the domain name didn’t change. These two facts don’t matter much. I’ll explain the more general case where the move can be across servers and the site’s address can change.
Export from the current WordPress site

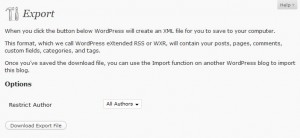
This tool doesn’t need much in order to work. You can restrict the data to be exported according to the author (which I didn’t use). Then, you save the exported file locally.
The file you get is an XML file. Save it somewhere handy as you’re going to have to open it in a minute.
Create backup for all the uploaded files and download it locally
The export process will include all the texts in your website (posts, pages, comments, categories, etc.).
To include uploaded files, such as images, movies and audio, I suggest that you download them all as one big TAR file. My original site was a WPMU site so the files were located in:
wp-content/blogs.dir/BLOG_ID/files
Open a shell window (SSH), go to that directory and grab it all by typing:
zip -r wp_files.zip *
Now, you’ll have one pretty large file called wp_files.zip. Use an FTP program to download it locally.
While you’re at it, do the same for your theme(s). Go to your themes directory and create an archive of your theme(s).
zip -r themes.zip theme1 theme2...
Create the new WordPress site
Next, comes the standard WordPress install for the new site (where we’re going to transfer to).
Web server admin panels normally come with handy utilities that allow you to create this all in one click. I created the MySQL database manually, edited wp-config.php and adjusted the Apache configuration file to point to the new site.
If you’re also moving boxes, this would also be the time to update the Domain Name Server (DNS) entry for that site. Don’t wait until the DNS entry propegates all the way down to your PC. Instead, open the hosts file in your PC (in Windows c:\Windows\System32\drivers\etc\hosts) and add an entry for your new site with the new IP address. Remember to delete this entry in a couple of days.
Add the uploaded files and theme
Once the new WordPress site has been installed you can add back all the uploaded data and your theme.
Store that wp_files.zip file in:
/wp-contents/uploads
Unzip it there by opening a shell window and typing:
unzip wp_files.zip
There you go! All your uploaded files have been moved at once and will appear in your new blog.
Do the same for the themes. Copy to /wp-contents/themes and unzip there.
Patch up the exported file
This is the most critical part of this whole migration, so pay attention and handle with care.
Open that Export file you saved before. You can use any text editor, but don’t use a program that’s going to change the format (e.g. Word). Notepad would be just fine for this purpose (Start->Accessories->Notepad).
There are two things that need to be replaced:
- Uploaded files (if they need to be moved)
- Domain name (if that has changed)
I moved all the existing uploaded files from /files/ to /wp-contents/. This was a required step as I migrated from WPMU to WordPress. You don’t need to change anything if you’re moving from and to the same WordPress type.
If you’re changing the domain name, do a global replace and change from the old one to the new one. There should be lots of places where this appears – change them all.
Save the file to a different name, so that you have both the original and your edits. You’ll want to have the original in case your edits cause it to be broken. XML files cannot be loaded if their formatting is damaged.
Import the data

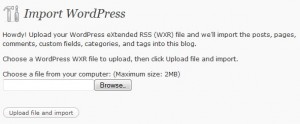
Click on Tools->Import->WordPress.
Select the file we patched before and click on ‘Upload file and import’.
WordPress will offer you to download files. Don’t select this option. We’ve already transfered all the uploaded files from your new blog to this one. We’ve done it in one go instead of doing this individually.
At this point, WordPress will also offer you to assign posts to users. It’s a good time to recreate the old authors now.
Configure your new site
Go to your new site and follow the WordPress install wizard (just one step). Then, before jumping in to anything, go through the Settings section and adjust everything that needs changing. I had to change:
- Settings: Changed the blog’s tagline
- Reading: Changed the default home and blog page.
- Permlinks: Changed from the default permlinks structure to year and month.
- Discussion: Enabled threaded comments
Of course, your adjustments would probable be different. The point is that you should really go through all the pages under Settings and make sure that they’re right for you.
Add plugins
I could have also zipped the plugins directory and included that in the move, but I didn’t. As long as I’m already refreshing things, I thought it might be a good idea to redownload all my plugins from the WP plugins repository (you know, get the fresh versions of everything).
The improved (fixed) search facility available as of WP2.7.1 makes it much easier. Click on Plugins->Add, search for each plugin, download and activate. Took less than a minute for all my plugins.
Enable your theme
Once everything is back in place, it’s time to enable your theme (which might rely on plugins to work correctly).
Go to Appearance->Themes and select your.
You’re all done!
