Why do I need the Multilingual Tools plugin?
The Multilingual Tools plugin can help theme and plugin developers to test their products’ multilingual capabilities. It will automatically add language code or custom notices to translated content, allowing the developer to review what is working correctly and what requires modification to be translated.
With this tool you can:
- Automatically generate strings for translations
- Add language information to duplicated posts
- Generate a WPML configuration file (wpml-config.xml)
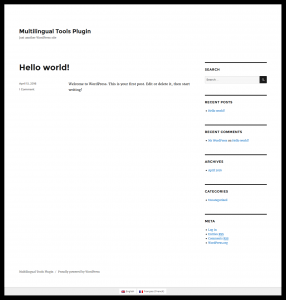
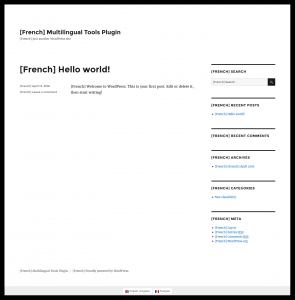
The end result of using the Multilingual Tools plugin is shown below:
| English | French |
 |
 |
How do I install and use Multilingual Tools to automatically generate translations?
This tool allows developers running development sites to check if their theme/plugin is multilingual ready.It is free and available to download here. It will produce a duplicate of the original content appended with the language code and modify any existing translations; therefore, you should never run it on production or client sites.
Note that WPML Multilingual CMS, WPML String Translation, and WPML Translation Management plugins are required for Multilingual Tools to work.
The Multilingual Tools plugin will automatically generate translations (appending language code with original strings) for:
- Posts, pages, and custom types
- Custom fields
- Tags, categories, and custom taxonomies
- All translatable strings
Automatic translation generation is achieved by following these three steps:
Basic WPML setup
In this tutorial, we will activate the “Twenty Sixteen” theme, and install and activate WPML Multilingual CMS, WPML String Translation, WPML Translation Management, and Multilingual Tools plugins.
WPML’s Getting Started Guide will help you to set up WPML in only a few minutes. Make sure to add at least one secondary language and set the language switcher (which is an easy way to switch between languages) to be displayed in the footer area in the front end.
Scanning your theme/plugin code for text
Every WordPress theme and plugin has some hard-coded text. If you’ve followed the WordPress coding guidelines, all these texts will be wrapped in gettext calls, described in the WordPress i18n guide. If not, now would be a great time to fix this.
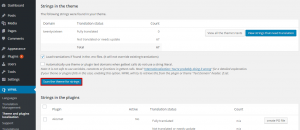
- Navigate to WPML > Theme and plugins localization.
- Choose the “Translate the theme and plugins using WPML's String Translation” option in the “Select how to translate strings in the theme and plugins” section.
- Choose the “WPML will automatically download translations for WordPress” option in the “Select how to get translations for WordPress core” section.
- Follow this guide to Download translations for WordPress – this will take care of any WordPress core strings that your theme is using.
- Scroll down and click on the “Scan theme for strings” button. If you are testing a plugin, select the checkbox next to it and click on “Scan the selected plugins for strings”.
Now, WPML is capable of translating all strings that are wrapped in Gettext calls and also has translations for the WordPress core text.
Auto-duplicate content for other languages
Now that we have all strings scanned, we can generate translations for the site. Remember that the Multilingual Tools plugin will only translate the sample content that you’ve created. If your theme or plugin requires test content, you should populate it first.
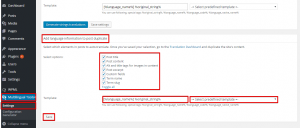
- Navigate to Multilingual Tools > Settings
- From the “Add language information to post duplicate” section choose which elements in the posts to auto-translate.
- Choose the template of the automatic translated text from the drop-down menu, for example, ([%language_name%] %original_string%). This will append the language name, code, or custom formatted string to your translation."
- Click on the “Save” button.
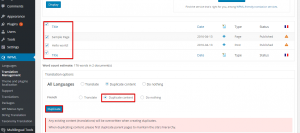
- Navigate to WPML > Translation Management
- On the “Translation Dashboard” tab, scroll down and choose the pages and posts that you want to set as translatable.
- From the “Translation options” section, choose the “Duplicate content” option and click on the “Duplicate” button.
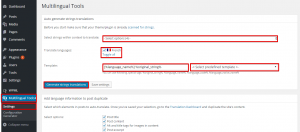
- Navigate back to “Multilingual Tools” > Settings.
- Choose the strings within a specific context to translate from the drop-down menu.
- Choose the translation languages.
- Choose the template of translation from the drop-down menu.
- Click on “Generate strings translations”.
Now, you can review your site’s front-end and see the results. In our example, we’ve selected the default Twenty Sixteen theme. You can see that all of the site’s content appears perfectly translated when we view the French content.
Hopefully, your theme/plugin translations will be complete too. If they aren’t, have a look at the WordPress i18n guide to learn how to achieve this.
Remember, the purpose of the Multilingual Tools plugin is to quickly show you what needs attention by illustrating what is translatable (and what is not) on the front-end and help you to re-test after you’ve made changes to your code. The tool cannot automatically edit code and fix compatibility problems.
How do I generate language configuration files using Multilingual Tools?
WPML can read a configuration file that points out strings that need translation and saves preferred translation options for themes and plugins. The file is named wpml-config.xml and it’s placed in the root folder of the plugin or theme. Read more about how the language configuration files work.
To generate your theme/plugin language configuration file, follow these steps:
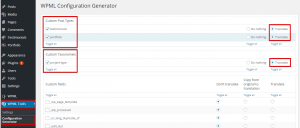
Go to the Multilingual Tools > Configuration Generation screen. You will find four sections:
- Custom Post Types (CPTs)
- Custom Taxonomies (CTs)
- Custom fields
- Admin Texts
Each section will allow you to set whether it is to be translatable. Note that for this example, we activated the Larx theme because it includes CPT, CT, custom fields, and admin texts.
- In the CPT section, choose the custom posts that you want to set for translation and choose the translate option. In our case, these are “testimonials” and “portfolio”.
- In the CTs section, choose the CTs that you want to set for translation and choose the translate option. In our case, it is “project-type”.
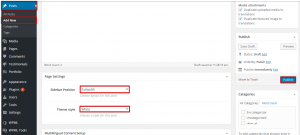
- Custom fields are set for translation in a different manner, as custom fields can be found in regular posts, pages, or custom posts of the theme. You will need to create a test post, add values to the custom fields, and publish it.
As an example, we will create a regular post and set its custom fields; in our case, they are “Sidebar Position” and “Theme style”. Then, click on the “Publish” button.
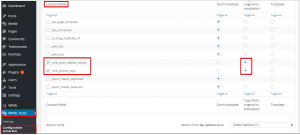
- Navigate to Multilingual Tools > Configuration Generator to find the custom fields, (_cmb_post_sidebar_layout) and (_cmb_theme_style), registered. Choose them and set them to copy, as they are layout settings and don’t require actual translation. If the custom filed is a user input and requires translation, set it to translate.
Note that for custom fields that require translation (a CT that requires the user to type in a string), you will choose the translate option.
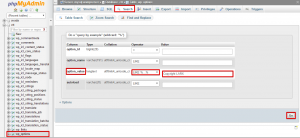
- To set admin texts for translation, we will need to take the option name from the database. Follow these steps:
- Go to the page where admin texts are saved. In our case, we will navigate to the Larx > Footer settings tab.
- Copy the footer text.
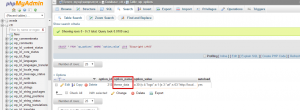
- Open phpMyAdmin or Adminer. Then, choose the “wp_options” table and search for the text, as shown below.
- Now, we have the theme option name from the database.
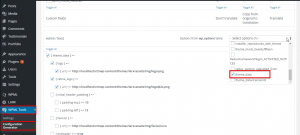
- Navigate back to Multilingual Tools and choose the theme options name from the drop-down menu.
- You will need to decide which options need to be translated. For the theme in this example, we set the Logo and Footer Text to be translated.
- Scroll down and choose “Save to theme directory” to automatically place the language configuration file in the theme folder or choose “Save to file” to download the file. Then, click on the “Generate” button.
Conclusion
The Multilingual Tools plugin can help you to automatically generate translations by appending language code to your theme/plugin original strings; thus, you can test the multilingual abilities of your theme/plugin. It can also help you to generate a WPML language configuration file in a few minutes.


