Introduction
WP All Export allows you to export multilingual websites translated with WPML. You can export posts, pages, WooCommerce products, custom post types, and more to a CSV or XML file. You have the option to export all the fields in WordPress (categories, tags, custom taxonomies, custom fields, etc.)
Required Plugins
- WP All Export plugin (version 1.5.3 or above)
- A recent version of WPML (version 4.0.8 or above)
Exporting Multilingual Websites
When you have a multilingual website, you will want to export your posts and pages in all languages. To achieve this, you will need to export the data for each language separately. For example, if you have translated your pages and posts from English to French using the WPML plugin and wish to export the data, you will end up with 4 files:
- English Posts
- French Posts
- English Pages
- French Pages
When exporting the files, you will need to have a field that links each page or post to its corresponding translated page or post. This can be accomplished by simply adding the «WPML Translation ID» to your fields.
Let’s go over a quick example of how we can export the posts for a multilingual website. In this example, we will export the posts created in both English and French. Note that, we have already created our post and translated them.
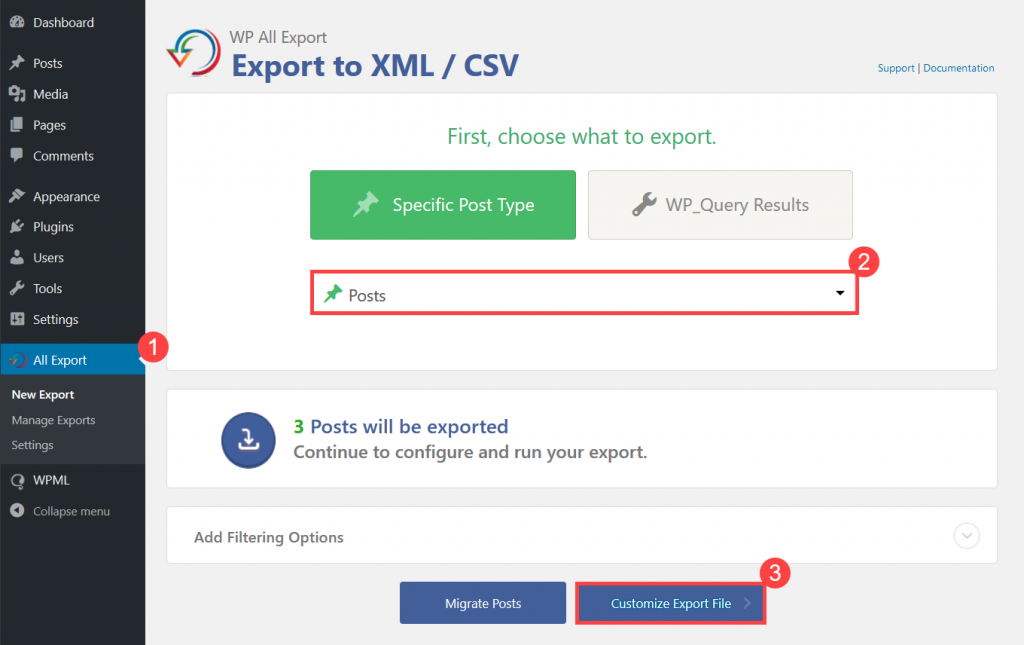
- To export the default language posts, go to WP All Export -> New Export.
- Choose Posts from the Choose a Post Type drop-down menu.
- Click on the Customize Export File button.
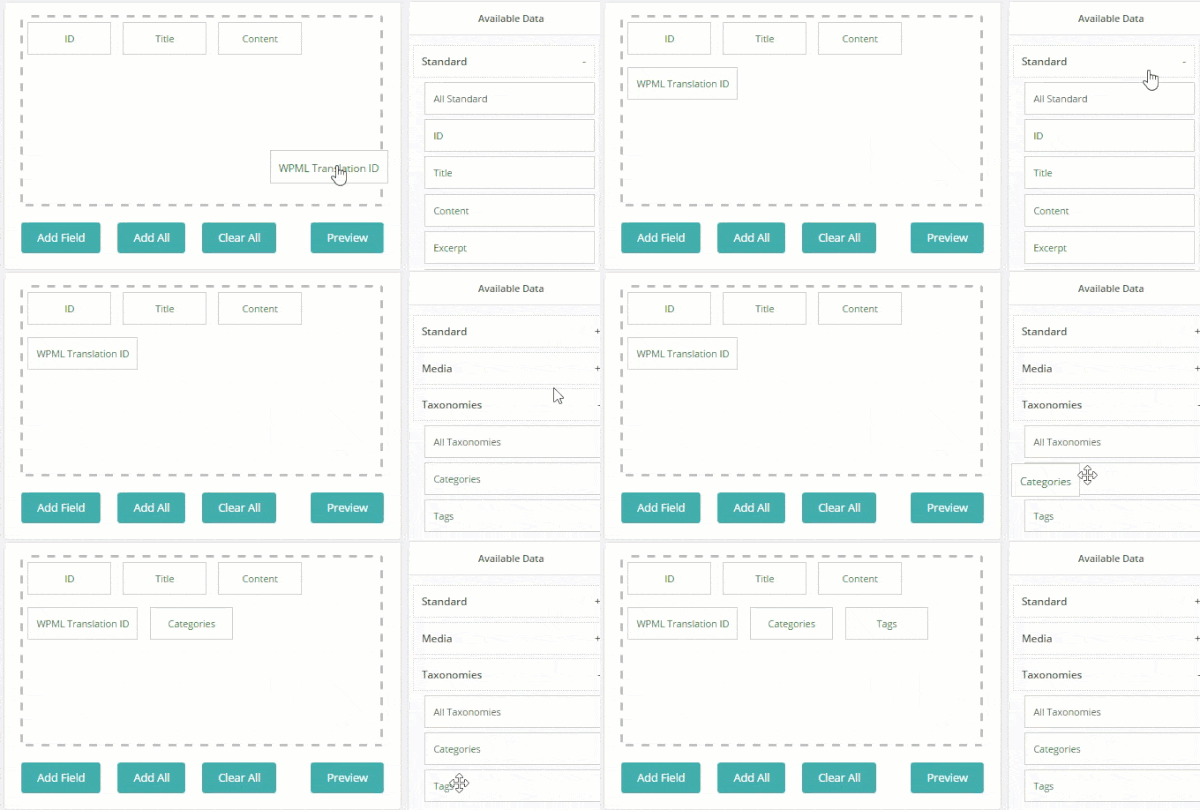
- Expand the Standard section under the Available Data window, and drag the WPML Translation ID to the fields area.
- You can also add the Categories and Tags fields to be exported.
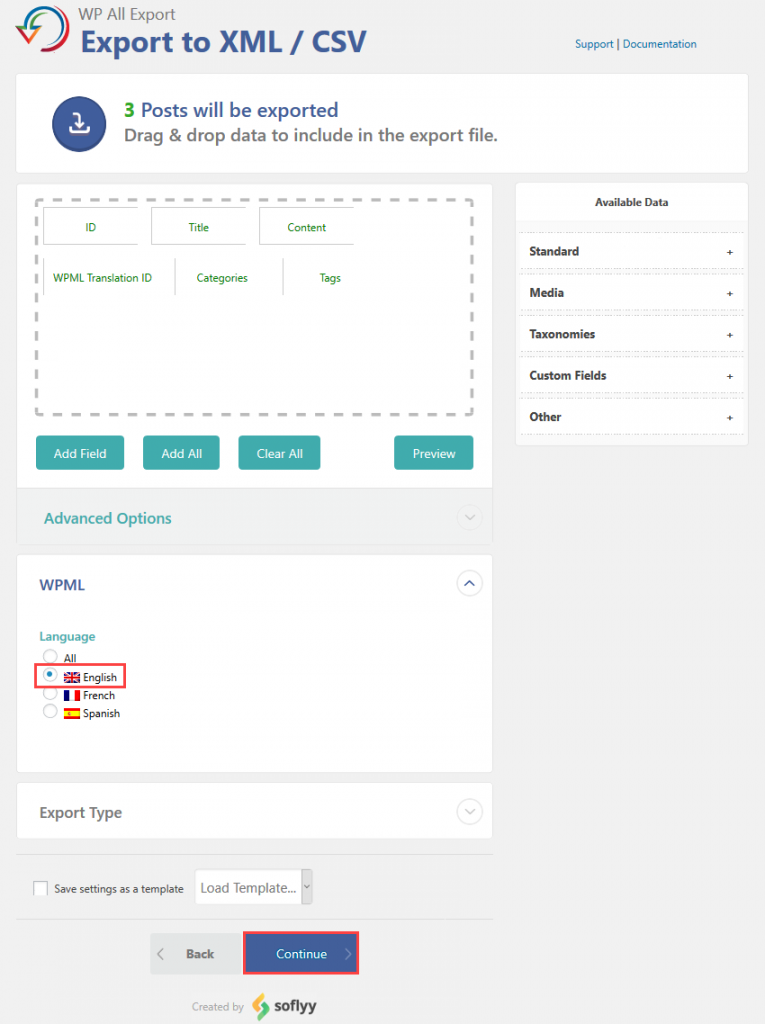
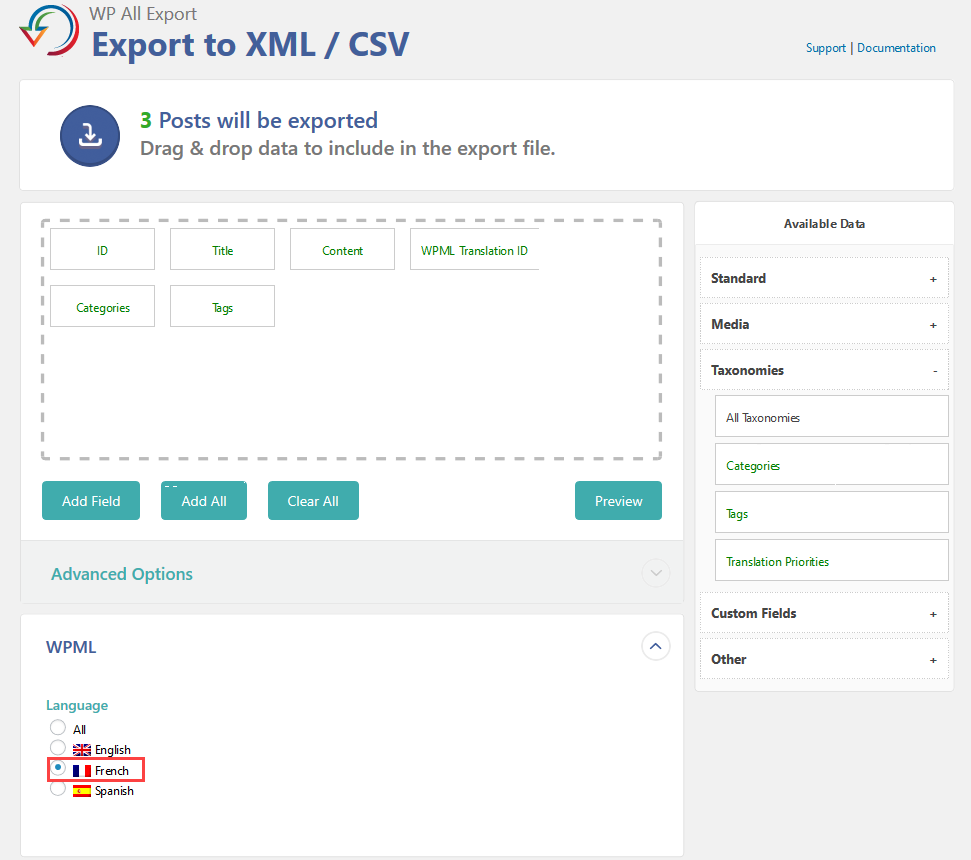
- Expand the WPML section and choose your site’s default language. In our case, it is English.
- Click the Continue button.
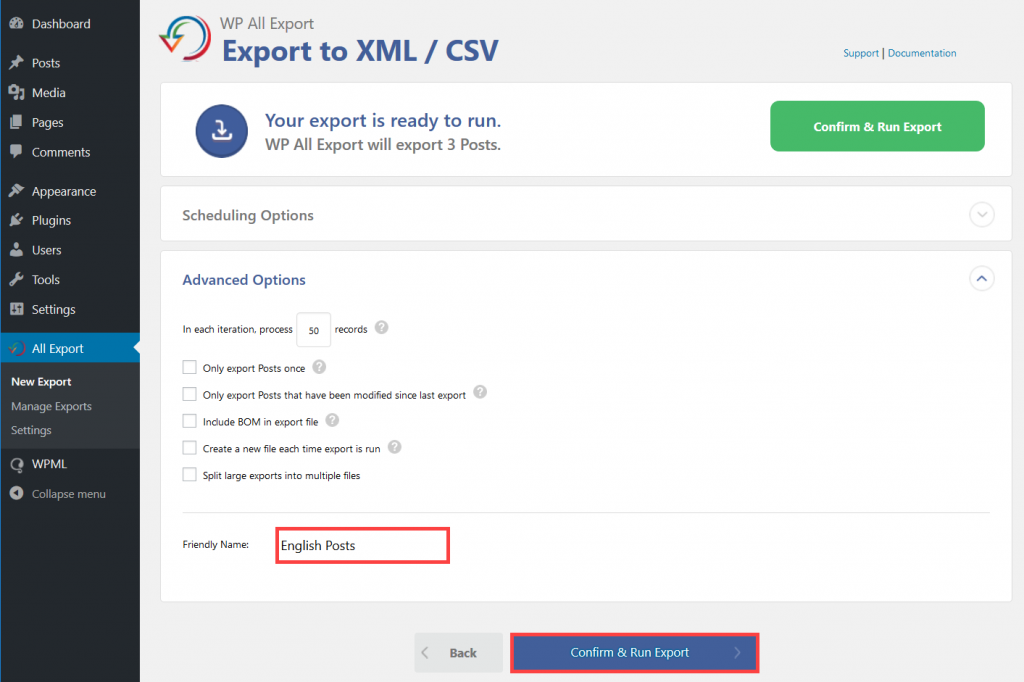
- On the Configure Advanced Setting screen, choose your preferred settings then add the exported file name in the Friendly name field. In our case, we will name it «English Posts». You can then click on the Confirm & Run Export.
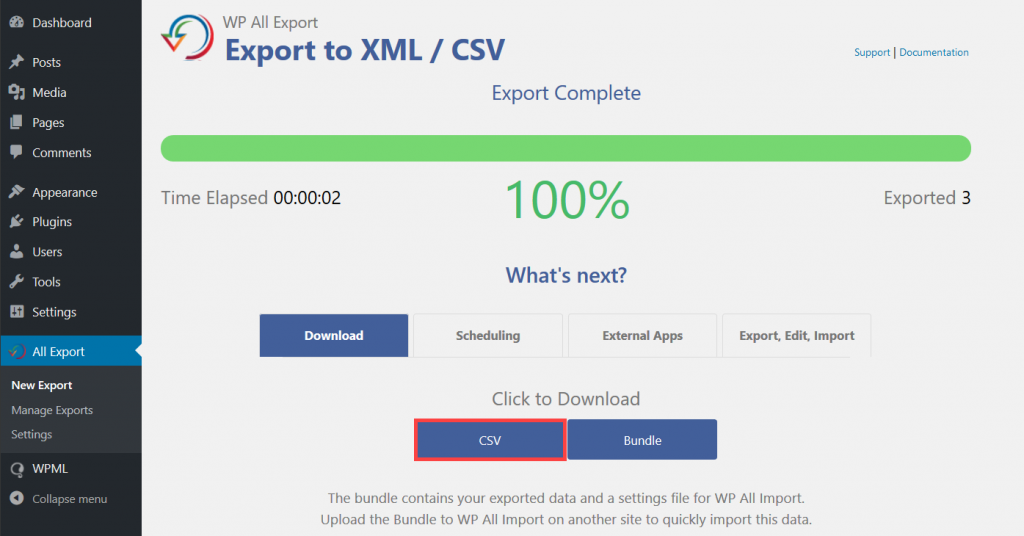
- Once the export process is completed, click on the CSV button to download the exported file.
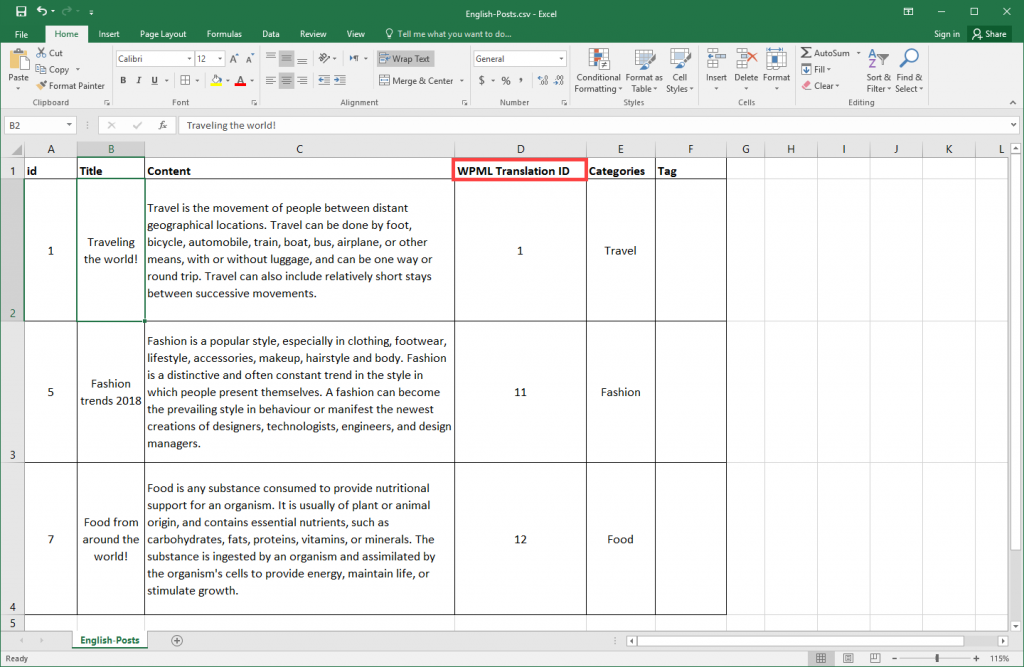
- Now we can open the CSV file and see the WPML Translation ID field, which will connect both the default and the secondary language CSV files when importing the data.
- Repeat the same process, but this time make sure to choose the secondary language you want to export in step (6). In our case, it will be French. As a result, you will have the secondary language CSV file exported.
Exporting your multilingual content with a cron job
When running a WordPress cron job to export your multilingual content, you may find that the content ends up assigned to the default language. To avoid this, you need to add the language code to the cron job’s URL. This way, the export is done in the correct language.
For example, to export the data in Portuguese, we can use the following URLs:
http://example.com/pt-pt/wp-cron.php?export_key=qj3Y0NoTYgS7&export_id=52&action=trigger
http://example.com/pt-pt/wp-cron.php?export_key=qj3Y0NoTYgS7&export_id=52&action=processing
As you can see, we added the /pt-pt/ (language code for Portuguese) to the URLs.
Conclusion
In this tutorial, we have provided detailed instructions on how to export your multilingual posts and pages. In order to import your multilingual posts and pages, you can follow the detailed steps given in the WPML All Import documentation.


