You can apply formatting markers by selecting the translated text and clicking the corresponding marker shown under the segment. In the Advanced Translation Editor, they appear as labels like strong, em, and code, based on standard HTML formatting tags.
When you use automatic translation, the Advanced Translation Editor applies these markers for you. If you edit the translation or write your own, you may need to apply the formatting.
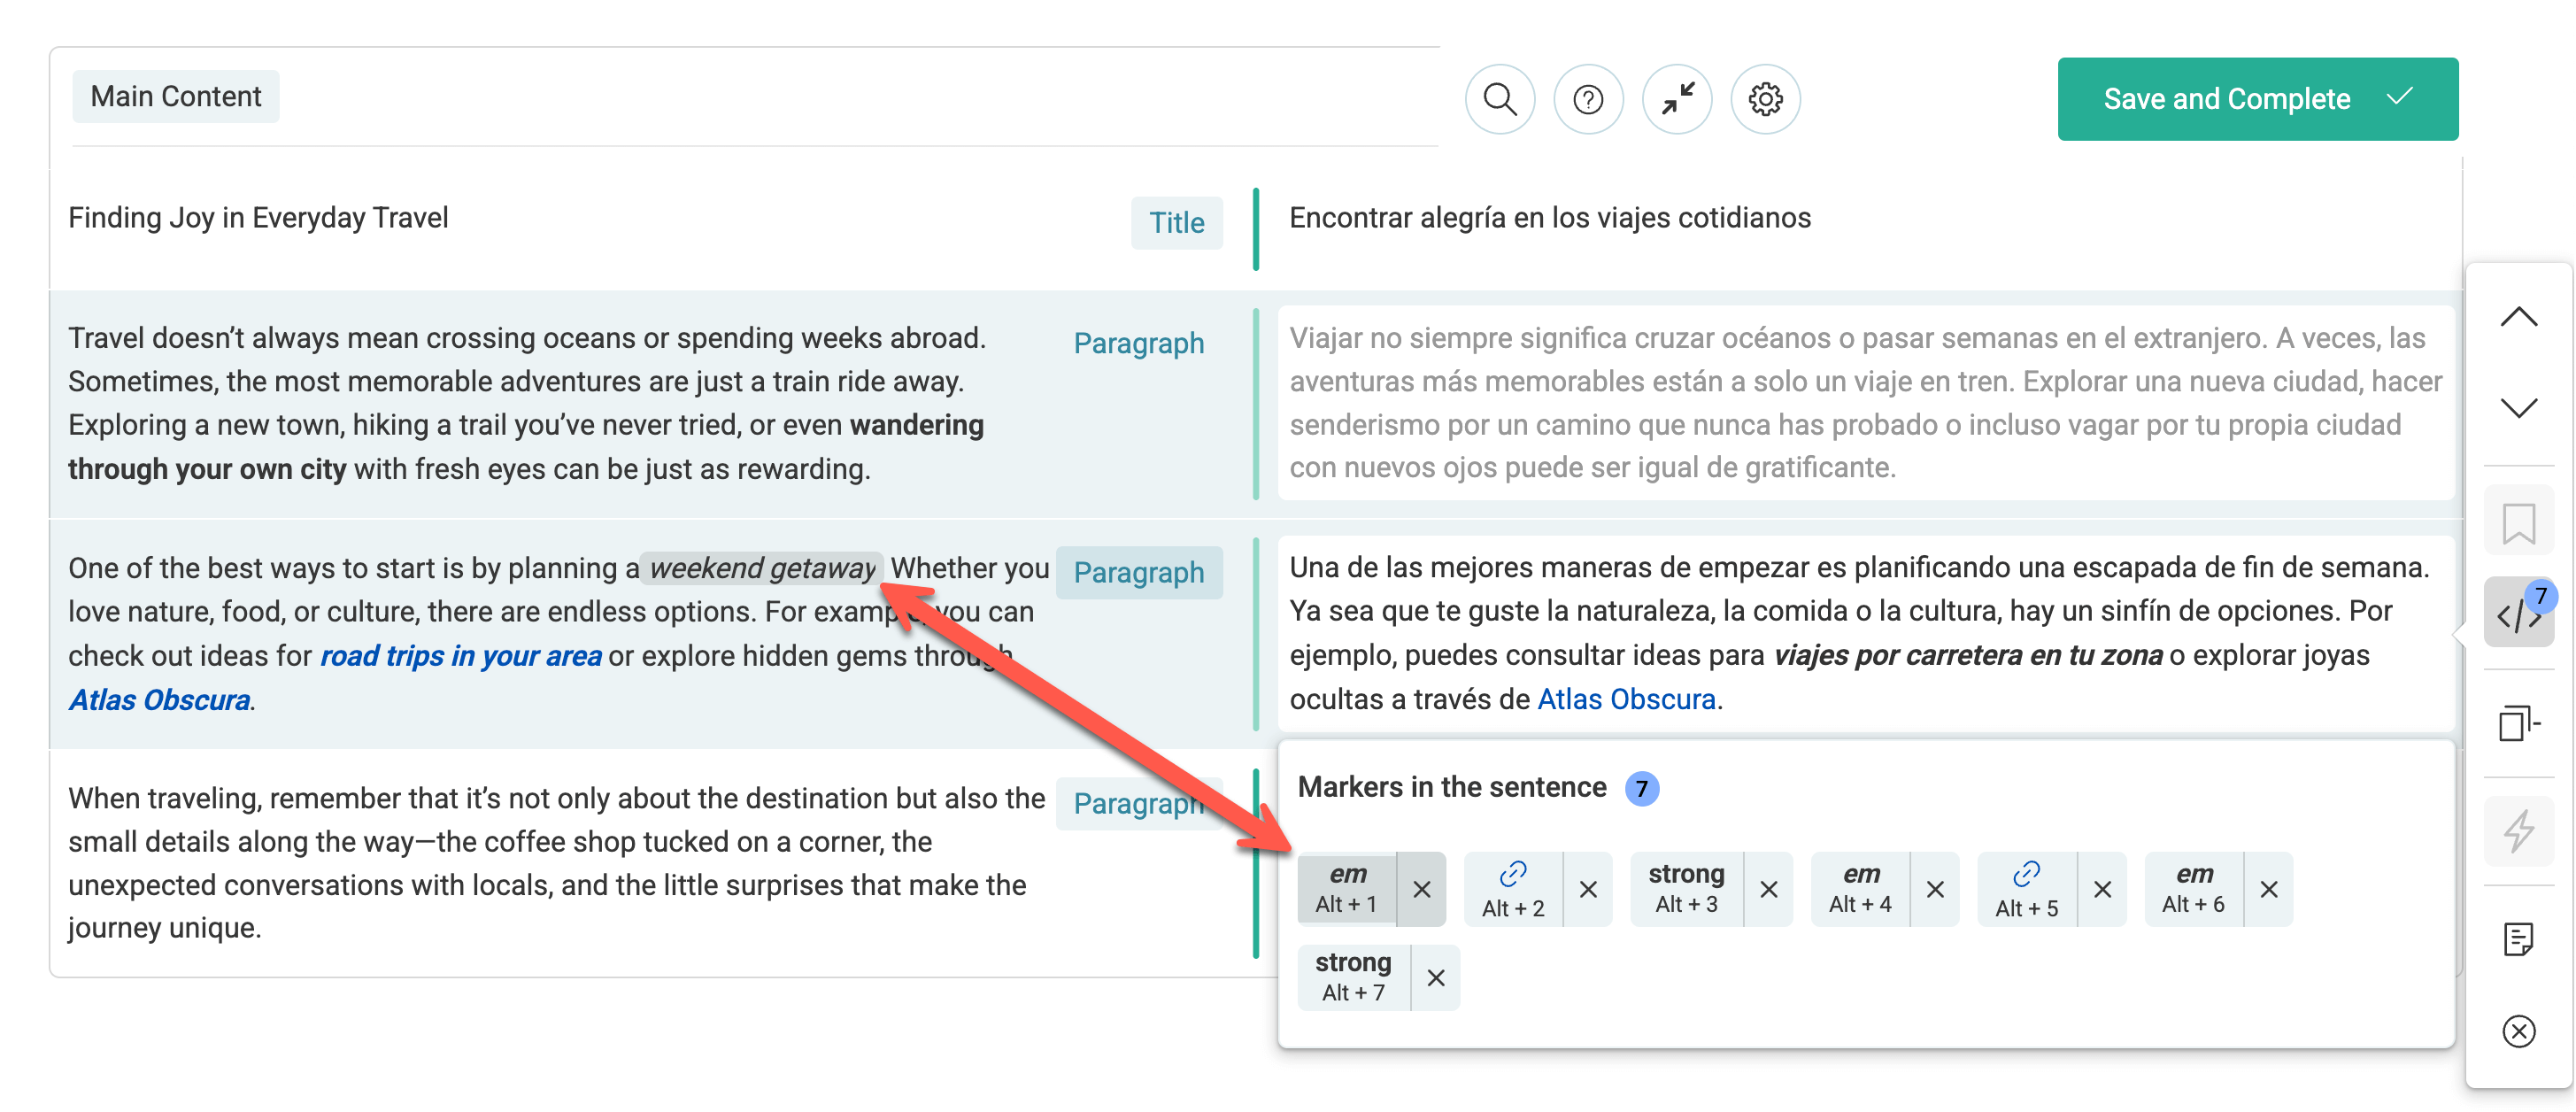
How do I apply markers to translated text?
To apply a marker from the original text to your translation:
Hover over the text in the default language to see which markers are used. The translation editor highlights the matching marker under the translation segment.
Hovering highlights the source text and its matching marker
Select the translated text you want to apply the marker on.
Click on the marker to apply it.
Select the translated text and click the marker to apply it
This workflow applies to all markers, including simple markers (like strong, em, code) and nested markers (for example, bold inside a link). For nested markers, you can apply them in any order.
If a marker is missing in your translation, the corresponding text in the original and the missing marker under the translation segment are both highlighted.
How do I apply hyperlinks?
Below the markers, the editor shows you any links included in the selected sentence.
You can add links the same way as other markers: highlight the translated text and click the hyperlink icon under the segment. You don’t need to edit the link itself. For more on how link translation works, see our FAQ on translating links.
Do I need to use all the markers from the original text in my translation?
No, you don’t need to use every marker. Simple formatting markers, like bold or italics, are optional in your translation. However, if the original text contains a hyperlink, you must also apply that hyperlink to the translation.