Types is ready to download and use. It allows creating custom post types, custom taxonomy and custom fields. It’s fully integrated with WPML and with Views, letting you build complex multilingual sites with WordPress without any coding.
Setting Up
Types creates three things:
- Custom post types
- Custom taxonomy
- Custom fields (meta boxes)
First, download Types, install and activate it. Once setup, you’ll see this main menu:
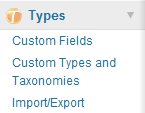
Click on Custom Types and Taxonomies to setup your own post and taxonomy types.
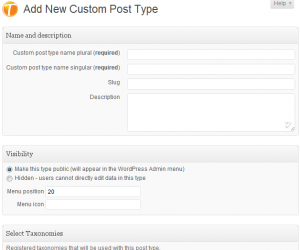
In the WordPress world, every piece of content is a post. This includes the standard posts and pages. When you want to add your unique content type, you’re creating a custom post type.
Taxonomy is the glue that connects related content together. List tags and categories group together related posts, so does custom taxonomy connect together custom post types. Custom taxonomy can connect any post type, including the standard types.
Click on Custom Fields to add meta-boxes to the WordPress editor.
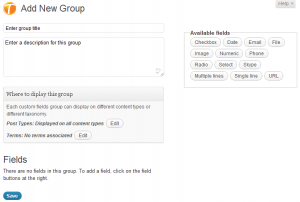
Types arranges custom fields in groups. It lets you select which group to display on different content types.
Groups have fields. You can choose standard fields, such as single-line and multi-line text inputs, or more complex fields such as file, image or Skype contact.
Click on Add a custom fields group. Give it a name and an optional description and add fields by clicking on their names from the list at the top-right.
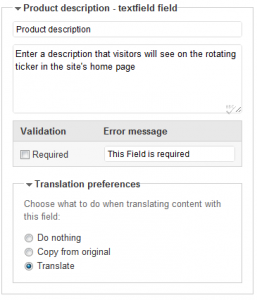
Once you’ve added a field, you can configure it. Give it a name and a description. Each type of field has its own unique setup.
This is how a group looks like on Edit screens:
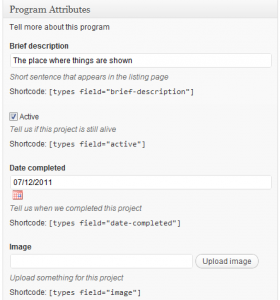
You can see various types of fields, including text, check-box and image uploads.
Displaying Custom Fields
You’ll notice that there’s a shortcode hint below different fields in the editor screens. These shortcodes allow to include the fields in the page content. When authors enter these shortcodes to the text, Types will replace them with the field content.
Custom field display is different for each field type. Text fields simply output their value. Check-boxes and radio groups will display the respective text for their state. Image fields output the images (allowing you to choose image dimensions) and other special fields have unique display options.
Authors can use the T icon, at the top of edit screens to choose from available fields to insert.

If you want to add fields to templates (so that they appear on all pages of the same type), you can use Views, to generate dynamic templates, or edit the template PHP files and use Types API calls to display fields.
Data Validation
Fields can also validate user-input. You can set any field as ‚required‘. Other fields have other validation options. For example, numeric fields will check that users only enter numbers and email fields will validate for well-formatted email addresses. You can enable or disable each of these validations, per field.
When authors enter content and validation fails, Types will highlight the incorrect fields and instruct users to edit them.
Custom-Field Translation Options
Types lets you choose what to do when translating content that includes these custom fields. By default, WPML will translate text fields and copy non-text fields. This means that images, check-boxes and numeric values will auto-synchronize between the original content and translations and texts will get translated.
Multilingual Admin Screens
WPML lets different users have different admin languages. This is especially useful if there are different people configuring and running the site.
All the texts that you enter in Types appear in WPML’s String Translation screen. This includes names, descriptions and labels and field values.
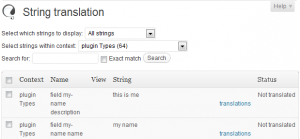
Once you translate these texts in the String Translation screen, users will see the localized languages on the WordPress Admin, as well as on public pages.
Translating Custom-Type Content
The central location for controlling what is multilingual is in WPML->Translation Management->Multilingual content setup. There, you will see all the custom types that you’ve added (post types, taxonomy and fields). Once you make custom types translatable, you’ll get the familiar translation controls in their lists screen. You’ll also be able to choose the in the Translation Dashboard.
WPML automatically adjusts the translation editor and according to the setup of different custom fields.
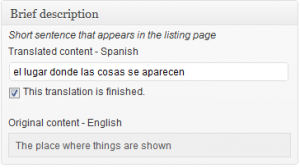
When you translate content that includes a custom field, you’ll notice that the name and description show for them. This allows translators to understand what they’s translating and where the text goes to.
Download, Cost and Support
You can download Types from Toolset website:
https://toolset.com/home/types-manage-post-types-taxonomy-and-custom-fields/
You’re welcome to read tutorials and complete reference documentation in Types & Views website.
Views is a powerful compliment to Types, allowing to display custom data without any coding. We’re offering commercial support for both Types and Views through the support forums on https://toolset.com.
Views and expert support for both plugins for one year costs $49 (USD).
