In this tutorial, you will learn how to create a multilingual site with Stitched and WPML.
Stitched is a theme for Artisans, you can use it’s homepage introduction component to tell your visitors about yourself and you are able to extend it’s functionality by installing the recommended plugins that can be integrated with it.
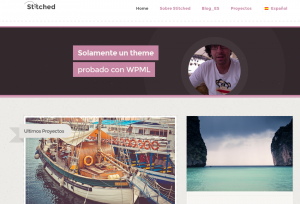
Stitched is developed by WooThemes, for themes and plugins developed by WooThemes we recommend you use WPML built in GUI for the translation of special features that WooThemes / Plugins use in their code, in this tutorial I will guide you for a step by step smooth way to do so.
You can see a live example in the Stitched + WPML demo site.
To run a multilingual Stitched site with WPML, you will need:
- Stitched theme
- A recent version of WPML, including the String Translation and Translation Management modules
Getting Started
These are the main steps you need to follow to get started:
- Install and activate Stitched
- Install and activate the WPML plugins (WPML Multilingual CMS, WPML String Translation, WPML Translation Management)
- Set up WPML from WPML->Languages. See our WPML Getting Started Guide for complete reference
- Install and activate one of the several plugins that can be integrated with Stitched, for the purpose of this tutorial we’ll use Projects
Translating the Introductory Message
The Stitched theme ‘Introductory Message’ feature is a combination of the site admin’s Gravatar image as well as the site tagline text. With WPML any text (or string as we like to call it here) that is not part of posts, pages & taxonomy is translated using the String Translation module.
The text for that is set in Settings > General
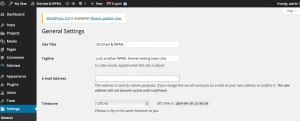
And now to translate you just go to WPML->String Translation and look for that string
, translate it, mark it as completed and save
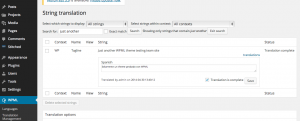
So this is how our front-end looks now including the Gravatar image that the theme is fetching automatically according to your settings
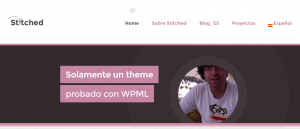
Translating General Texts
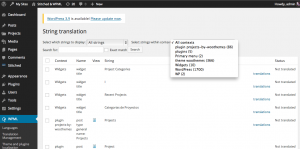
Stitched comes with some more strings you might want to translate. You can complete any missing translations using WPML’s String Translation module as I described for the ‘Introductory Message’. If some strings are missing follow the instructions for Theme and Plugin Localization. In a nutshell, go to WPML->Theme and Plugin Localization, and click on ‘Scan the theme for strings’. Note that you can easily filter for the right strings in the context scroll down – for stitched filter to ‘theme woothemes’ and for the ‘Projects plugin’ filter for ‘plugin projects-by-woothemes’, this looks something like that:
Translating integrated plugins
Now that we have seen how to translate all the text coming from the theme, let’s see how do we make the strings and features coming from a Woo Plugin also translatable. For the sake of this tutorial I have chosen the very nice plugin recommended for use with Stitched – ‘Projects by WooThemes’.
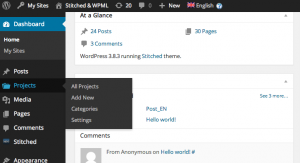
After you have installed and activated ‘Projects’ you’ll be able to see in your WordPress admin a new menu called exactly this…’projects’ as here:
In order to make your projects and their categories translatable you use WPML settings (WPML GUI), basically what you do is you go to WPML->Translation Management like that
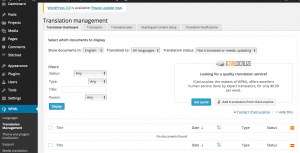
Choose Multilingual Content Setup from the tabs at the top

Before we continue just a few words of what actually is happening here in the background – Projects Plugin like many other plugins (and themes) is using Custom Post Types for it’s functionality, these are kind of ‘special’ posts, because they are special WPML does not ‘know’ that these need to be translated, so our next step here is to tell WPML exactly that – translate Projects!
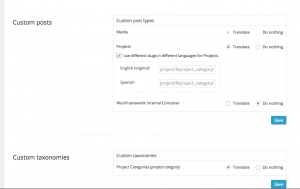
Click on Custom posts, choose Translate for Projects – as you see you can also set the Projects slugs to be translatable, and just below you can translate the Custom Taxonomies related to these custom posts, in this case called ‘Project categories’, now just Save and that’s it. In the same manner you can control how the custom fields are being handled for transaltion by clicking on Custom fields translation link at the top, for Projects you can set 3 custom fields:_client, _project_image_gallery, & _url but for these I recommend you follow the next point –
Let’s see how does the Projects admin page looks like, we click on ‘Projects’ in the admin screen and now – as in any ‘normal’ page or post we can duplicate, or translate any existing Project, create a new one in any language we like to, and very important – use the full functionality of the post type project – in this case we are able to add Details, Description and the special gallery it offers us, like that:
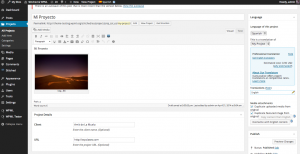
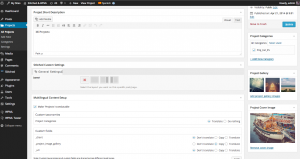
Making Custom Fields (and other things) translatable in custom post edit page
Last point here – as you have probably noticed in the last screen – you can also control how Custom fields and even Taxonomy & Post Types are handled for translation in each edit page for a Post, let’s enlarge that a bit:
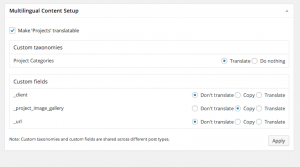
Here we want the _project_image_gallery to be copied between languages, and I found the _client & _url fields to make sense left not translated – you can still change these in the translated post page but we don’t really need them translated.
Styling the language switcher
Last but not least, let’s make a small tweak to have WPML languages switcher perfectly integrated in Stitched main navigation. WPML language switcher has added classes to it that can be styled according to your needs, you can even create a whole custom language switcher if you want too. Here this is not needed, all we want is to give the flag some padding so it ‘sits’ in place and not seem awkward
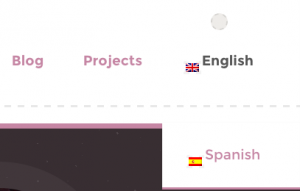
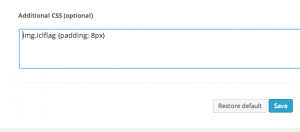
To do that let’s go to WPML->Languages->Language switcher options->Additional CSS (optional) and add some padding to the class that controls the styling of the switcher’s flag image – img.iclflag
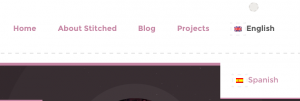
Now it looks very nice, just like any other Stitched menu item
Concluding
Stitched is a very nice theme to go Multilingual and tell the world about yourself and your projects, you can also add a shop to it using WooCommerce & WPML Multilingual & Multicurrency for WooCommerce. We have seen how you can smoothly adjust it’s features using WPML.
Versions used
- WordPress 3.9
- WPML 3.1.5
- Stitched theme 1.0.2
- Projects plugin 1.2.0
