Introduction
Divi is a smart and flexible multipurpose theme, it comes with an easy to use page builder and a handful of pre-made layouts that will help you create the website that suits your needs.If you are willing to have a multilingual site, Divi’s integration with WPML will allow you to translate all the theme elements effortlessly.
What you will need
- The Divi theme (version 2.7.3 or above).
- A recent version of WPML (version 3.3.7 or above), including the String Translation, Translation Management and Media translation add-ons.
Essential resources
- WPML’s Getting Started Guide will help you in setting up WPML in a few minutes. You will want to refer later to some of its subtopics, such as Theme and Plugin Localization and String Translation. We recommend that you keep this guide open while following this tutorial.
- Divi’s documentation will provide you with all the information needed to set it up and using its different features.
Content
- Getting started
- Translating Divi’s home page/ any page created with Divi page builder.
- Translating other pages, posts, custom post types, and taxonomies
- Translating other theme and site texts
- Translating Divi’s theme options
- Translating Divi’s custom layouts
- Translating Divi’s menus
- Getting help
- Conclusion
Getting started
- Install the Divi theme and activate it.
- Install and activate the core WPML plugins (WPML Multilingual CMS, WPML String Translation, WPML Translation Management) first, followed by other WPML plugins that may depend on them.
- Set up WPML from WPML > Languages. See our WPML Getting Started Guide for complete reference. The initial, simple three-step setup is self-explanatory, asking you to choose your default language, a set of active languages, and a language selector. (For starters, choose the footer language selector; you can change this later.)
- For this tutorial we will be creating our home page using the predefined layouts that comes with Divi.
- On your WordPress dashboard click on “Pages”, then “ Add New”.
- Click on “Use The Divi Builder” button.
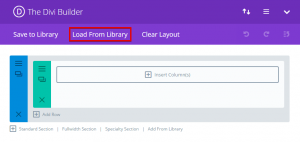
- Click on “Load From Library”.
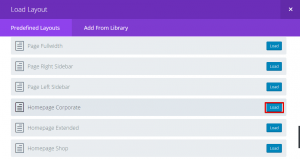
- Scroll down and click on the “Load” button next to “Homepage Corporate” , you can choose any layout you prefer.
- Now, You can click on the preview link to see your home page.
Translating Divi home page
https://youtu.be/euR6YI-ROiU
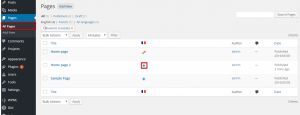
- Navigate to “Pages” > “All Pages” on your WordPress dashboard, You will see columns for each active language, with a
icon (for ‘edit translation’) or a
icon (for ‘add translation’) next to each page. Go ahead and Click on the
icon to edit the translation for the home page that you have created.
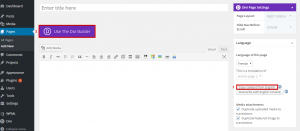
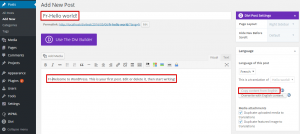
- Click on the “Copy content from English” found on the language meta-box on the right, then click on “Use the Divi Builder ” button.
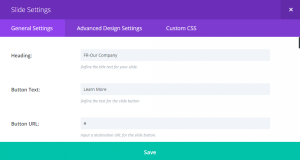
- Add the translated text to the page title and the different theme elements and click on the “Save” button.
Note that these steps apply to any page created using the “Divi Page Builder”.
Translating pages, posts, post categories, custom post types and custom taxonomies
In a similar manner, you can translate all other pages and posts, including the custom post types “Projects”. For example, here is how to translate a post :
- Navigate to “Posts” and click on the
icon.
- Click on the “Copy content from” button to load your default language post content.
- Add the translated content.
Translating post categories
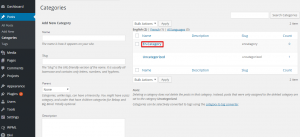
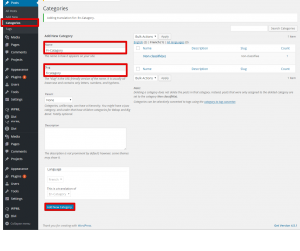
- Navigating to Posts > Categories, as an example we will create a category and name it “En-Category” and click on the “Add New Category” button.
- Click on the category that we have created.
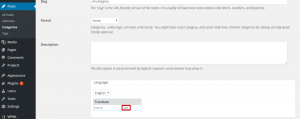
- Click on the “add” link to add the translation of the category.
- Fill the Name, Slug and Description fields with the category translation and click on the “Add New Category” button.
Translating custom post types (Project) and Project categories
The custom post type “Project” can be translated using the same steps followed to translate the regular post. Also, the post project categories can be translated in the same manner as we translated the regular post categories.
Translating custom taxonomies
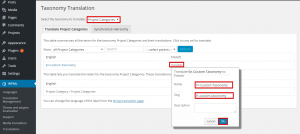
- Go to WPML > Taxonomy Translation
- Select “Project Categories” from the “Select the taxonomy to translate” drop-down menu.
- Click on the “translate” button to add the custom taxonomy translation by filling the required fields and then click on the “OK” button, as shown below.
Translating Divi’s theme text and other strings on your website
To translate the theme strings, you will need to scan it for strings. This will register the strings for translation on the string translation screen. (Read more about Theme and Plugin Localization.)
This can be done by following the steps below:
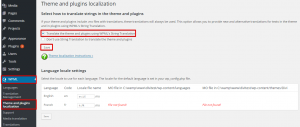
- Go to WPML > Theme and plugin localization.
- Choose the “Translate the theme and plugins using WPML’s String Translation” option and click the “Save” button.
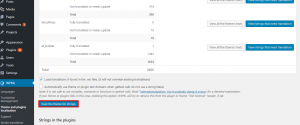
- Click on the “Scan the theme for strings” button. This will register the theme texts for translation on the string translation screen. Check the illustration below.
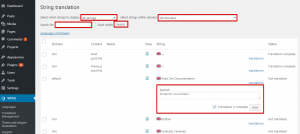
- Now you can navigate to WPML >> String translation
Strings can be filtered by:
- Select which strings to display (Translation complete, Translation needed, Waiting for translator).
- Select a specific text domain.
- Search for a specific string by typing it in the “search for:” field and click the “search” button.
- Click on “translations” and add your translated text. Then choose the “Translation is complete” option and click “Save.”
Note that translating the theme options can be achieved by choosing “admin_texts_et_divi” string domain on the string translation screen.
Translating Divi’s theme options
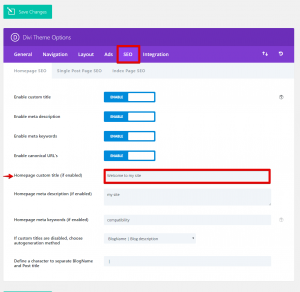
Theme options can be translated using the string translation page. For example if we want to translate the “Homepage custom title” available in Divi’s SEO theme options.
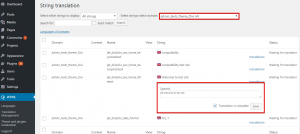
Navigate to the “String Translation” page and choose the string domain “admin_texts_theme_Divi”, find your Homepage custom title and add the translated content then click on the “Save” button as shown below.
Translating Divi’s custom layouts
With Divi you can create your own layouts and save them to be used in different pages or posts. Check Divi’s documentation of Saving and Loading Custom Layouts. These layouts can be translated using WPML, you can even have different layouts for your languages. Follow these steps to create, save, translate and load your custom layouts:
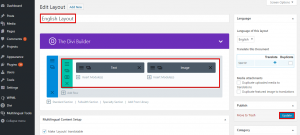
- On your WordPress dashboard navigate to Divi > Divi Library and click on the add new button. Ensure that the main language switched in your WordPress dashboard is set to be your default language.
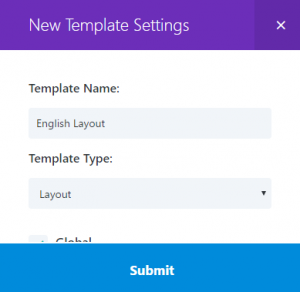
- Fill in the layout name and choose the “Template Type:” to be “Layout”
- Create the layout structure that you prefer, in our example we will add a text module to the left and an image module to the right, then click on the “Publish” button.
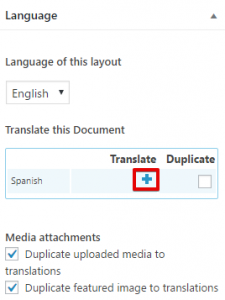
- Click on the
icon in the language meta-box found on the right to create the translated layout.
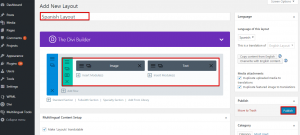
- Add the title for the translated layout, in our case it will be “Spanish Layout”. You can choose a different layout structure. For example we set the text module to be on the right and the image module to be on the left. You can choose any layout you prefer then click on the “Publish” button.
When loading these layout templates to your pages, you can load the English layout to your English pages and the Spanish Layouts to the spanish pages. This can be done by:
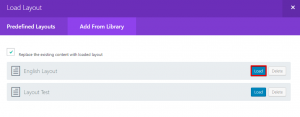
- adding a new page > Click on the “Use Divi Builder” button > Click in “Load From Library” tab.
- Click on the the “Add From Library” tab and click on the “Load” button to load the English layout.
The same steps can be followed to add the translated layout to your secondary language(s) page(s).
Translating Divi’s menus
With WPML, you can easily synchronize between your languages’ menus. For more information, please check our full menus translation tutorial.
Getting help
If you need help using WPML with Divi theme, please navigate to our technical forum.
Before posting your concerns, we recommend that you review the following:
- Ensure you have the latest versions of the theme and WPML plugins, and that they are all activated. These include WPML Multilingual CMS, WPML String Translation, and WPML Translation Management.
- Confirm that your issue does not arise when the WPML plugins are deactivated, but does arise when only the core WPML plugins are activated. In other words, ensure that it is an issue of compatibility of Divi with WPML. Otherwise, Divi’s support can offer better assistance.
Conclusion
Divi theme has many features, with WPML integration you will be able to easily translate all its different elements. The detailed instructions introduced in this tutorial will allow you to build your localized website smartly using Divi theme and WPML.


