Introduction
Bridge is a simple and efficient multi-purpose theme that will allow you to create your ecommerce, blog or portfolio website. It provides 24 layout concepts and 100 unique demos, making it easy to build your next website.
Bridge’s integration with WPML allows you to translate all theme elements effortlessly.
Step by step instructions will be provided in this document on how to translate Bridge theme with WPML.
What you will need
- Bridge theme (version 7.6 or above)
- A recent version of WPML (version 3.3.6 or above), including the String Translation, Translation Management and Media translation add-ons.
Essential resources
- WPML’s Getting Started Guide will help you in setting up WPML in a few minutes. You will want to refer later to some of its subtopics, such as Theme and Plugin Localization and String Translation. We recommend you keep this guide open while following this tutorial.
- Bridge’s documentation has a step by step guide on how to set it up.
Content
Getting started | Install and activate the Bridge theme, import content and set up WPML plugin
Translating pages, posts, custom post types and custom taxonomies | Translate pages, posts, portfolios/testimonials and portfolio categories/testimonial categories
Translating Qode sliders | Translate all the strings created by the Qode slider
Translating menus | Synchronize menus across languages and translate them
Translating theme text | Scan your theme for strings and get everything translated
Translating theme options | Translate all theme options
Getting started
These are the main steps you need to follow to get started:
- Install the Bridge theme and activate it.
- Install and activate the core WPML plugins (WPML Multilingual CMS, WPML String Translation, WPML Translation Management, WPML Media Translation), and other WPML plugins that may depend on them.
- Set up WPML from WPML >> See our WPML Getting Started Guide for a complete reference, but the initial simple three-step setup is self-explanatory, asking you to choose your default language, a set of active languages, and a language selector. (For starters, choose the footer language selector, you can change this later.)
For this tutorial, we will use some of the sample content available in Bridge theme; you can import this content by following the below steps:
- Login to WordPress admin
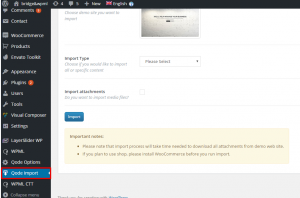
- Go into admin panel > Qode Options > Qode Import.
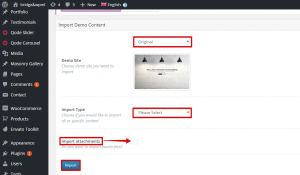
- Choose the demo site that you wish to import from using the dropdown menu. We will choose “Original”
- From the dropdown menu on the right, choose what type of content you would like to import. We will choose “All”. Note that if you wish to import media files (images, videos, sounds), check the “Import attachments” box.
- Click the “Import” button.
Translating Bridge theme elements
Translating pages and posts
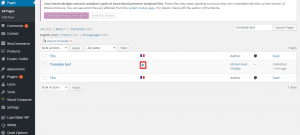
When you navigate to “Pages” in the WordPress dashboard you will see columns for each active language, with a icon to add translation. Check the illustration below.
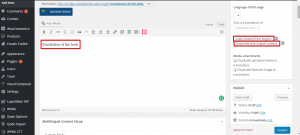
Now you will be able to translate your page by setting the translated title and body and then clicking on the ‘Publish’ button.
Note that you can click on the ‘copy content from’ or ‘overwrite with content’ options found on the language meta box to the right.
The ‘copy content from’ option will automatically copy the content from the primary (default) language to the translated language, giving you the option to translate the copied content.
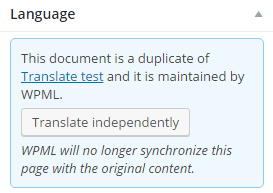
The ‘overwrite with content’ option will always set the translation of that page to be a duplicate of the original page (in the default language). You can disconnect the page to be translated independently by clicking on ‘ Translate independently’ found on the language meta box. Check the illustration below.
Translating the custom post “Portfolio”
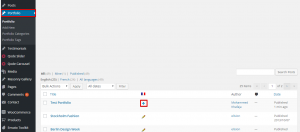
Navigate to ‘Portfolio’ in your WordPress dashboard and click on the icon to add the translation. Check the illustration below:
Add the translated content.
Translating the custom post type “Testimonials”
The same steps followed in translating the custom post type “Portfolio” can be followed to translate the “Testimonials”.
Translating the custom taxonomy “Portfolio Categories”
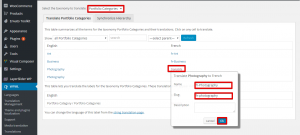
- Go to WPML >> Taxonomy Translation
- Select “Portfolio Categories” from the Select the taxonomy to translate drop down menu.
- Click on the “translate” to add the custom taxonomy translation by filling the required fields and then “OK” as illustrated below.
Translating the custom taxonomy “Testimonials Categories”
The same steps followed in translating the custom taxonomy “Portfolio Categories” can be followed to translate the “testimonials”.
Translating Qode sliders and slides
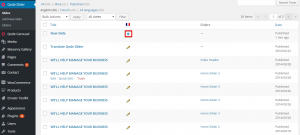
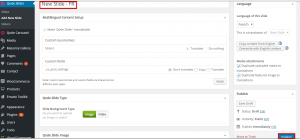
To translate slides, navigate to Qode slider >> slides. Now click on the icon and simply fill in your translated text and publish, as shown in the illustrations below.
To translate the Qode slider follow the below steps:
- Navigate to Qoad Slider >> Slider
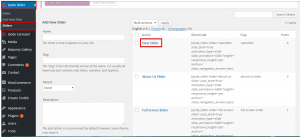
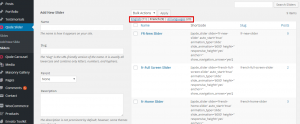
- Click on the created slider as shown in the illustration below.
- Click on the add button on the language section as shown below.
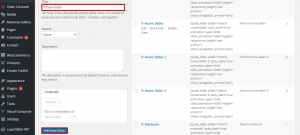
- Fill the (Name, slug and description) with the translated content and click on the ‘Add new slider’ button, as shown in the illustration below.
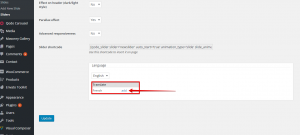
With this, a duplicate slider is created with the translated content to the secondary language. You can choose to display the sliders created under the primary, secondary or all languages as shown in the illustration below:
Translating menus
With WPML you can easily synchronize between your languages’ menus, for more information please check our full translating menus tutorial.
Translating theme text and other strings on your website
To translate the theme strings you will need to scan your theme for strings, as this will register the strings for translation on the string translation screen. (Find out more about Theme and Plugin Localization)
This can be be done by following the steps below:
- Go to WPML >> Theme and plugin localization
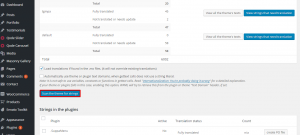
- Click on the “Scan the theme for strings” button, this will register the theme texts for translation on the string translation screen. Check the illustration below.
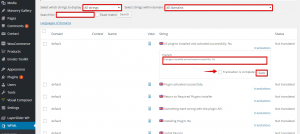
- Now you can navigate to WPML >> String translation and filter the strings by “translation needed” to see which strings are missing translations, or select a specific text domain. You can also search for a specific string by typing it in the “search for:” field and then clicking the “search” button. Once you find your string, click on “translations” and add your translated text. Now choose the ‘Translation is complete’ option and click save. Check the illustration below.
Translating theme options
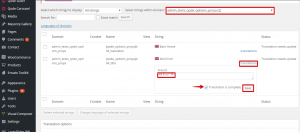
Translating theme options can be done by navigating to WPML >> String translation and selecting the (admin_texts_qode_options_proya) domain as shown in the illustration below.
Getting help
If you need help with using WPML with Bridge theme, please head over to our technical forum. Before posting about issues, we recommend that you review this quick checklist:
- Make sure you have the latest versions of the theme and of the WPML plugins, and that they are all activated. These include WPML Multilingual CMS, WPML String Translation and WPML Translation Management.
- The problem does not appear if the WPML plugins are deactivated, but it does appear when only the core WPML plugins are activated. In other words, try to make sure that it is an issue of compatibility between Bridge theme and WPML, since otherwise Bridge support is likely to be able to help you better.
Conclusion
Bridge theme has many elements, and all of them can be translated using WPML. You can translate pages, posts, menus, custom post types like (portfolios and testimonials), custom taxonomies like (Portfolio Categories and Testimonials Categories) and all the different theme elements found in Bridge.


