The Events Calendar plugin is a powerful and easy-to-use extension that allows you to create, organize and manage events on your WordPress site.
The Events Calendar is a very popular extension and it offers many add-ons for better handling of your events. One of the most prominent related add-ons is the Event Tickets one which allows you to sell tickets for your events with the help of WooCommerce.
WPML Multilingual & Multicurrency for WooCommerce is here to help you with making all these extensions and add-ons available for use in multiple languages.
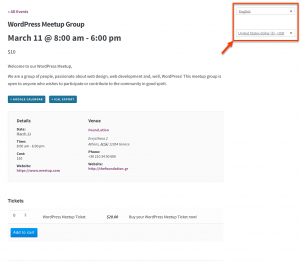
The Events and Event Tickets are translatable just like any other Post or Product using WPML and WPML Multilingual & Multicurrency for WooCommerce. You can use WPML’s Translation Editor (recommended) for the Events and WPML Multilingual & Multicurrency for WooCommerce’s Translation Editor (recommended) for the Event Tickets.
Events can optionally include additional elements like Venues, Organizers and Extra Fields for the Events, which you can also fully translate.
Additionally, WPML Multilingual & Multicurrency for WooCommerce allows you to use multiple currencies with your event tickets or enable the automatic exchange rate feature.
Requirements
To be able to create Events and Tickets with the Event Calendar plugin, you need the following plugins installed and active on your site:
- Event Calendar
- Event Tickets
- WooCommerce
- WPML
- WPML Multilingual & Multicurrency for WooCommerce
- WPML String Translation
- WPML Translation Management
- WPML Media
- Event Calendar Pro (optionally)
- Event Tickets Pro (optionally)
In order to have all the options presented in this article, you will also need the Pro versions of the Event Calendar plugin and Ticket add-on.
Additionally, you will need to perform the basic setup for WooCommerce, WPML, and WPML Multilingual & Multicurrency for WooCommerce plugins.
Translating an Event
To translate an Event the procedure is the same as for translating a post in WPML.
In your site’s WordPress administration, go to the Events page and click Add New to create your Event. After saving it, you are able to translate it.
On the right side click the “+” icon for your preferred language to begin the translation.
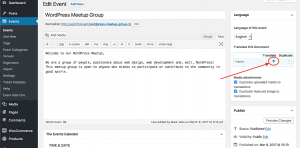
In the next step, use the Translation Editor to translate the content.
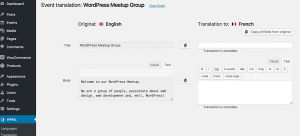
Click Save or Save and Close to finish the translation of your Event.
Translating an Event Venue
To translate a Venue, you need to follow similar steps as for translating an Event.
Go to the Events -> Venues page and click Add New to create your Venue. After saving it, you can translate it by clicking one of the “+” icons under the Languages section on the right.
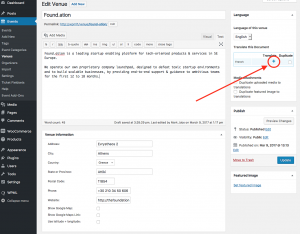
After clicking it, use the Translation Editor to complete your translation.
Translating Event Organizers
Translating Organizers is also similar to translating Events.
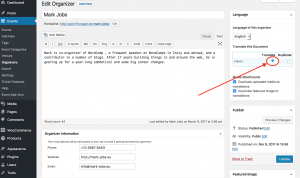
On the post edit screen for the event Organizers, use the “+” icons under the Language section to create translations in any of the languages of the site.
Translating Event Tickets
You can create two kinds of tickets: RSVP or WooCommerce. You can find them inside an Event on the Ticket section.
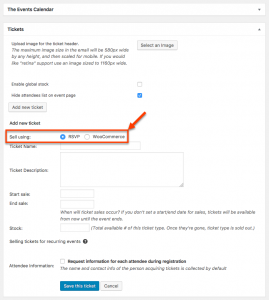
If you create an RSVP Ticket, all the fields will appear in the Translation Editor when you go and translate the event.
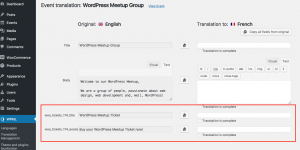
If you create a WooCommerce Ticket, things are a little bit different because we can use WooCommerce and WPML Multilingual & Multicurrency for WooCommerce for handling this type of tickets.
After creating the WooCommerce Ticket, you can go to the WooCommerce –> WPML Multilingual & Multicurrency for WooCommerce page and translate it.
Translating Event Categories and Tags
To translate taxonomies associated with Events and Tickets, use the WPML -> Taxonomy Translation page.
