Many sites and themes need a currency switcher that matches their custom design. Learn how to build your own currency switcher using PHP.
Understanding PHP Templates for Currency Switchers
Here’s a basic example of a PHP template for a currency switcher:
<?php
/**
 * @var string $css_classes
 * @var string $format
 * @var string $selected_currency
 * @var string[] $currencies
 */
?>
<div class="<?php echo esc_attr( $css_classes ) ?>">
	<ul>
		<li class="wcml-cs-active-currency">
			<a class="wcml-cs-item-toggle"><?php echo wp_kses_post( WCML_Currency_Switcher_Template::get_formatted_price( $selected_currency, $format ) ); ?></a>
			<ul class="wcml-cs-submenu">
				<?php foreach ( $currencies as $currency ) : ?>
					<?php if ( $currency != $selected_currency ) : ?>
						<li>
							<a rel="<?php echo esc_attr( $currency ); ?>"><?php echo wp_kses_post( WCML_Currency_Switcher_Template::get_formatted_price( $currency, $format ) ); ?></a>
						</li>
					<?php endif; ?>
				<?php endforeach; ?>
			</ul>
		</li>
	</ul>
</div>
This template:
- Opens the container
<div>and<ul>HTML tags that structure the switcher - Displays the selected currency
- Loops through the available currencies
- Outputs a
<li>HTML list item for each currency (excluding the currently selected one) - Outputs clickable links to switch the currency
Now, let’s walk through how to create such templates for your own currency switchers.
Adding a Currency Switcher Template to Your Theme
You can add a directory to your theme to hold your custom currency switcher templates.
- If you’re developing a theme that you plan to distribute or sell, include the templates directly in the theme. This way, all users of your theme will be able to use the currency switchers you create.
- If you’re customizing an existing theme, create the templates inside a child theme. This prevents your changes from being overwritten when the parent theme is updated.
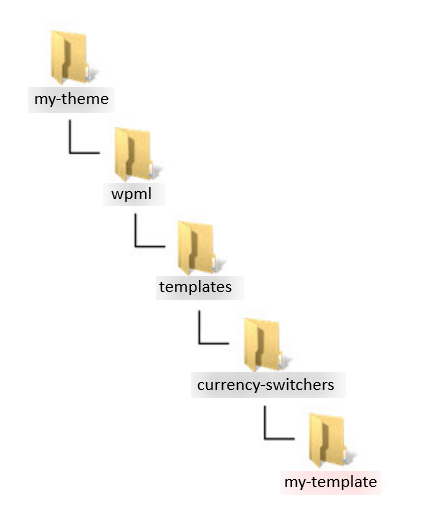
Use the following folder structure for your custom switcher templates:
my-theme/wpml/templates/currency-switchers/my-template
To build this structure:
- Inside your theme (or child theme), create a folder named wpml. WPML Multilingual & Multicurrency for WooCommerce uses this naming convention because it works together with WPML.
- Inside wpml, create a templates folder.
- Inside templates, create a currency-switchers folder.
- Inside currency-switchers, create one subfolder for each custom switcher you build—for example, my-template.
Inside each custom switcher folder (for example, my-template), you’ll need:
template.php— Required. This is your main PHP template file.config.json— Required. This file provides WCML with metadata about your currency switcher.- Any optional CSS or JS files — Include these if your switcher uses custom styling or interactivity.
In earlier versions of WPML Multilingual & Multicurrency for WooCommerce (up to 5.5), you could use a template.twig file if no template.php file was present. If both were included, WPML Multilingual & Multicurrency for WooCommerce would always use template.php.
As of WPML Multilingual & Multicurrency for WooCommerce 5.6, .twig files will no longer be supported. Going forward, always use template.php to define your currency switcher’s structure.
Designing the template.php File
The template.php file defines the layout and behavior of your custom currency switcher. It uses standard PHP and outputs the HTML that will be rendered on the front end.
Inside your template, you can use the following variables provided by WPML Multilingual & Multicurrency for WooCommerce:
$css_classes(string): CSS classes applied to the main container.$currencies(array): A list of available currencies.$selected_currency(string): The currently selected currency.$format(string): A string that defines how the currency should be displayed.WCML_Currency_Switcher_Template::get_formatted_price( $currency, $format ): A static method used to format and display each currency label.
When writing your template, follow WordPress UI best practices to ensure your switcher is accessible and consistent with other theme elements. Also make sure to escape dynamic output using functions like esc_attr() and wp_kses_post() to keep your code secure.
Setting Options in the config.json File
Each custom currency switcher must include a config.json file. This file provides WPML Multilingual & Multicurrency for WooCommerce with basic information about your currency switcher, such as its name and any CSS or JS assets it needs.
Required Fields
The file must define the currency switcher’s name:
{
  "name": "My custom switcher"
}
You don’t need to add a prefix to the name. WPML Multilingual & Multicurrency for WooCommerce will automatically handle that based on the theme or plugin the switcher belongs to.
Optional Fields
In addition to the required name, you can include two optional fields:
css: A list of CSS files to load from your template folder. By default, WPML Multilingual & Multicurrency for WooCommerce will automatically enqueue all.cssfiles in the template folder, but you can override that behavior with this field.
"css": ["style.css", "responsive.css"]
js: A list of JavaScript files to load from your template folder. Only use plain JavaScript unless your theme or plugin already includes a JS library like jQuery.
"js": ["script.js", "click-handler.js"]
Here’s a complete config.json that includes all fields:
{
"name":           "My custom Vertical List",
"css":            ["style.css"],
"js":             ["script.js"],
}
Adding Currency Switcher Templates to the Uploads Folder
You can also store your custom currency switcher templates in the WordPress uploads folder. This is useful if you want to keep templates safe from theme or plugin updates.
Place your templates in the following path:
../wp-content/uploads/wpml/templates/currency-switchers/
WPML Multilingual & Multicurrency for WooCommerce automatically scans this path for currency switcher templates.
Adding Currency Switcher Templates to a Plugin
If you’re building a plugin and want to include custom currency switchers, you need to tell WPML Multilingual & Multicurrency for WooCommerce where to find them.
Use the wcml_cs_directories_to_scan filter to register the template directory. Add this code to your main plugin file:
function myplugin_wcml_cs_dirs_to_scan( $dirs ) {
    $folder_name = basename( dirname( __FILE__ ) );
    $dirs[] 	= trailingslashit( WP_PLUGIN_DIR ) . $folder_name . '/templates/';
    return $dirs;
}
add_filter( 'wcml_cs_directories_to_scan', 'myplugin_wcml_cs_dirs_to_scan' );
WPML Multilingual & Multicurrency for WooCommerce will then scan the templates folder inside your plugin. You need to place each custom currency switcher in its own subfolder, like this:
my-plugin/templates/my-template/
Full Example: Custom Currency Switcher
This example shows how to create a complete currency switcher with its own folder, template, config, and optional styles.
- In your theme or child theme, create the following folder:
wpml/templates/currency-switchers/custom-currency-switcher/
- Create a
config.jsonfile inside the folder:
{
"name": "Custom currency switcher"
}
- Create a
template.phpfile to display the selected currency and a list of the others:
<?php
/**
* @var string $css_classes
* @var string $format
* @var string $selected_currency
* @var string[] $currencies
*/
?>
<div class="<?php echo esc_attr( $css_classes ) ?>">
	<ul>
		<li class="wcml-cs-active-currency">
			<a class="wcml-cs-item-toggle"><?php echo wp_kses_post( WCML_Currency_Switcher_Template::get_formatted_price( $selected_currency, $format ) ); ?></a>
			<ul class="wcml-cs-submenu">
				<?php foreach ( $currencies as $currency ) : ?>
					<?php if ( $currency != $selected_currency ) : ?>
						<li>
							<a rel="<?php echo esc_attr( $currency ); ?>"><?php echo wp_kses_post( WCML_Currency_Switcher_Template::get_formatted_price( $currency, $format ) ); ?></a>
						</li>
					<?php endif; ?>
				<?php endforeach; ?>
			</ul>
		</li>
	</ul>
</div>
- If you want to customize the appearance, add a
style.cssfile:
.your-custom-class li {
  list-style: none;
  float: left;
  margin: 0 3px;
}
Using Custom Currency Switchers in PHP Templates
Once you’ve created a custom currency switcher, you can use it in your PHP templates by calling the wcml_currency_switcher action.
do_action('wcml_currency_switcher', array(
  'format' => '%name% (%symbol%)',
  'switcher_style' => 'twenty-seventeen-my-custom-switcher'
));
The switcher_style value depends on two things: the switcher’s location and the name defined in its config.json. WCML generates the slug automatically using this format:
| Location of the custom currency switcher | How the slug is generated |
|---|---|
| Theme folder | Theme slug + sanitized switcher name |
| Plugin folder | Plugin slug + sanitized switcher name |
| “uploads” folder | “uploads-” + sanitized switcher name |
So, let’s say:
- Your theme is Twenty Seventeen
- Your switcher’s
config.jsoncontains:
{ "name": "My custom switcher" }
Then the generated slug will be:
twenty-seventeen-my-custom-switcher
Use this as the value for switcher_style in the code snippet above.