We’ll show you how to use memoQ to edit the XLIFF files that WPML produces.
1. Saving the XLIFF email attachment
Save the XLIFF to the folder of your choice.
2. Opening a memoQ project
Open the project that you usually use or create a new project.
3. Adding documents
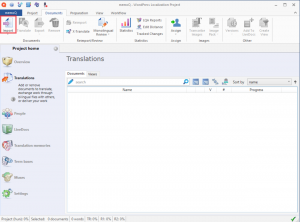
Click Import on the ribbon, then select the XLIFF file you saved to the folder of your choice, as below. An alternative to this is to simply drag-and-drop the XLIFF file into the window of your opened memoQ project.
Select the document you imported, click Details to show document details (if it’s not currently shown), and make sure the Filter configuration is WordPress (WPML) filter.
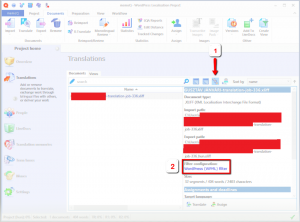
If the filter is WordPress (WPML), this means memoQ could recognize that your file comes from WPML, and you are ready. If it reads XLIFF filter or anything else other than WordPress (WPML) filter, proceed with the next steps. This may happen with older memoQ or WPML versions.
4. Reimport with options
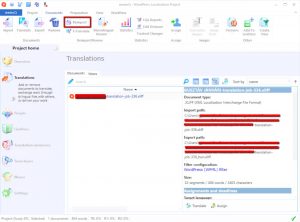
Since memoQ could not automatically detect the filter, you need to explicitly tell memoQ which filter to use. With your previously imported document still selected, click the Reimport button of the Reimport/Review group of the Documents ribbon. Click Yes on the confirmation dialog to proceed with the same file you’ve imported before.
5. Select the WordPress WPML filter
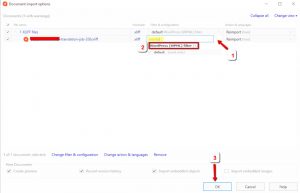
Select the document on the Document import options dialog, click the drop-down arrow under the Filter & configuration column (#1 on the screenshot), and select the default filter under WordPress (WPML) filter (#2 on the screenshot). To find the filter more quickly, start typing “WordPress” in the field (as highlighted). When done, click OK.
6. Translate using memoQ
Translate the document(s) using memoQ as you’d translate any other documents. Though a lot of effort is made to provide you with clean text, for some WordPress plugins, it may happen that you see some HTML codes and shortcodes (text within square brackets) as translatable text. Be cautious about this. If you don’t know what it is, it’s best to leave it as is, however it may also happen that some of the code needs to be translated. Consult the site’s administrator to find out more about the specific issue.
An example is shown below.
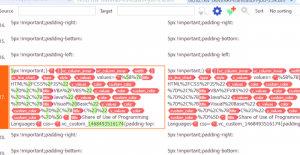
In this particular case, the text within <title> tags needs to be translated. However, you need to URL-encode the translated text to make sure you don’t leave spaces and special characters in the titles. Other plugins may work quite differently, so there’s no rule of thumb for scenarios like this. If you’re not sure, it’s best to contact the client or WPML’s support for assistance.
7. Export translated document
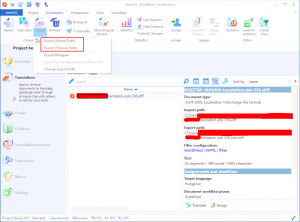
When you are done, just click Export (Stored Path) or Export (Choose Path) on the Documents ribbon.
8. Completing the translation
In the site’s admin, go to the WPML Translation page and use the Import / Export XLIFF section to upload your translated file.
That’s it, you successfully completed the translation using memoQ.
