Learn how to manage your sites, credits, invoices, plugin downloads, and other account details from your WPML Account page.
With your WPML account options, you ensure WPML is set up correctly on your site, manage your payments and credits, and modify subscription preferences (such as automatic renewal).
Downloading WPML and its add-ons
When you purchase a WPML subscription, you get access to the WPML core plugin, plus additional plugins based on your plan. To install WPML for the first time, you need to:
Go to your WPML account and download the plugin zip files.
Head to the site that you want to translate, install WPML and go through the setup wizard.
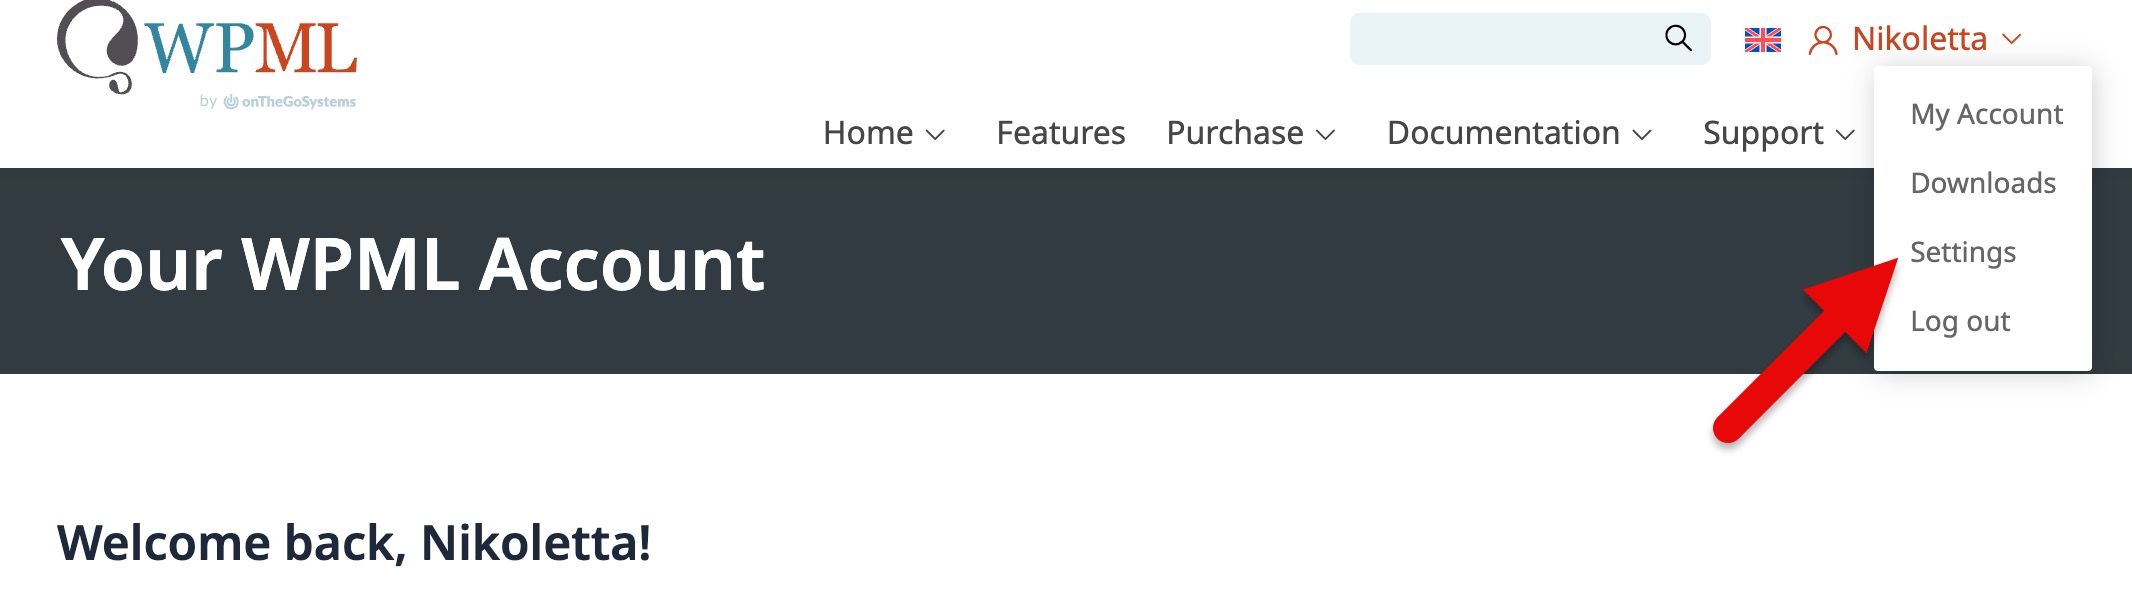
To download WPML, add-ons and compatibility plugins, go to your WPML account, expand the dropdown under your account name and click on Downloads to go to the Downloads page.
Available Plugins On The Downloads Page
On the Downloads page, you can:
Download the OTGS Installer (recommended). This is a lightweight, auxiliary plugin that helps you easily install all WPML components your site needs. Check our documentation on how to install and use the OTGS Installer.
Download individual WPML components for manual installation. To manually download WPML, scroll down the Downloads page and expand the Download WPML manually option.
See this list of WPML Core and Add-on Plugins. Keep in mind that if you have a WPML Multilingual Blog plan, you only have access to the WPML Core.
Managing Payment Details, Account Details, and Invoices
From your WPML Account, you can view and download all invoices and see your payment history. Simply click on Payment History and Invoices. If you need help, check our guide on finding your invoices.
Updating Personal and Billing Details
From your WPML account, you can edit:
Personal details, such as name and email address associated with your account.
Billing details that appear on your tax invoices, such as billing name, VAT number, company details, and country.
Register sites and manage keys from your WPML account. This is useful if you want to re-register a site after unregistering it, get keys for multiple sites, or assign credits from your balance.
To register a site and get a key from your WPML account, follow these steps:
Go to your WPML account page.
Click on Register WPML on your sites under the Download and Register WPML section. This will take you to the “Your Registered Sites” page.
Click on Register your first site (for the first time) or Register a new site.
Add your site URL in the field that appears to get the site key. From the same popup, you can assign credits from your credit balance to that specific site.
Every site you register with WPML appears under the Your Registered Sites page. You can check the site key any time by clicking on Show Key.
Generating A New Key to Re-register a Site
If you need to re-register a site, follow this process:
Go to your site’s WP Admin, navigate to Plugins → Add New, and switch to the Commercial tab. There, click Unregister WPML from this site.
Now go to your WPML account, and click on Register WPML on your sites under the Download and Register WPML section. This will take you to the “Your Registered Sites” page.
Click on Register a new site, add the URL and copy the key.
Go back to the Commercial tab and re-register using the new key.
Re-allocating Credits from Old Sites
If you have sites registered in your account that you no longer use, you can delete them. Deleting the sites returns their credits to your credit balance, allowing you to allocate those credits to new sites.
Note: If you still want to keep the site, you can manually remove credits and return them to your account. To do this, check the Add or Remove Credits on Registered Sites section.
To delete old sites and get back their assigned credits:
Go to your WPML account page.
Click on Register WPML on your sites under the Download and Register WPML section. This will take you to the “Your Registered Sites” page.
From Your Registered Sites page, find the old site(s) and click on the trash icon next to the site.
Check your credit balance to confirm the credits are there.
Changing the URL of a site from Development to Production
Go to your WPML account, and click on Register WPML on your sites under the Download and Register WPML section.
Find the development site on the list of registered sites. Development sites are marked with a globe icon right next to the URL.
Click on the globe icon next to the trash icon.
In the popup that appears, add the public site URL and click Publish.
Important note: When you migrate a site from development to production, you need to re-register the site to be able to use automatic translation properly. Follow our Site Migration guide to re-register a production site.
Managing Automatic Translation Credits via Your Account
From your WPML account, you can buy and assign credits, turn on Pay-as-You-Go on specific sites, and manage automatic translation invoices.
Buy Credits
To buy credit packages:
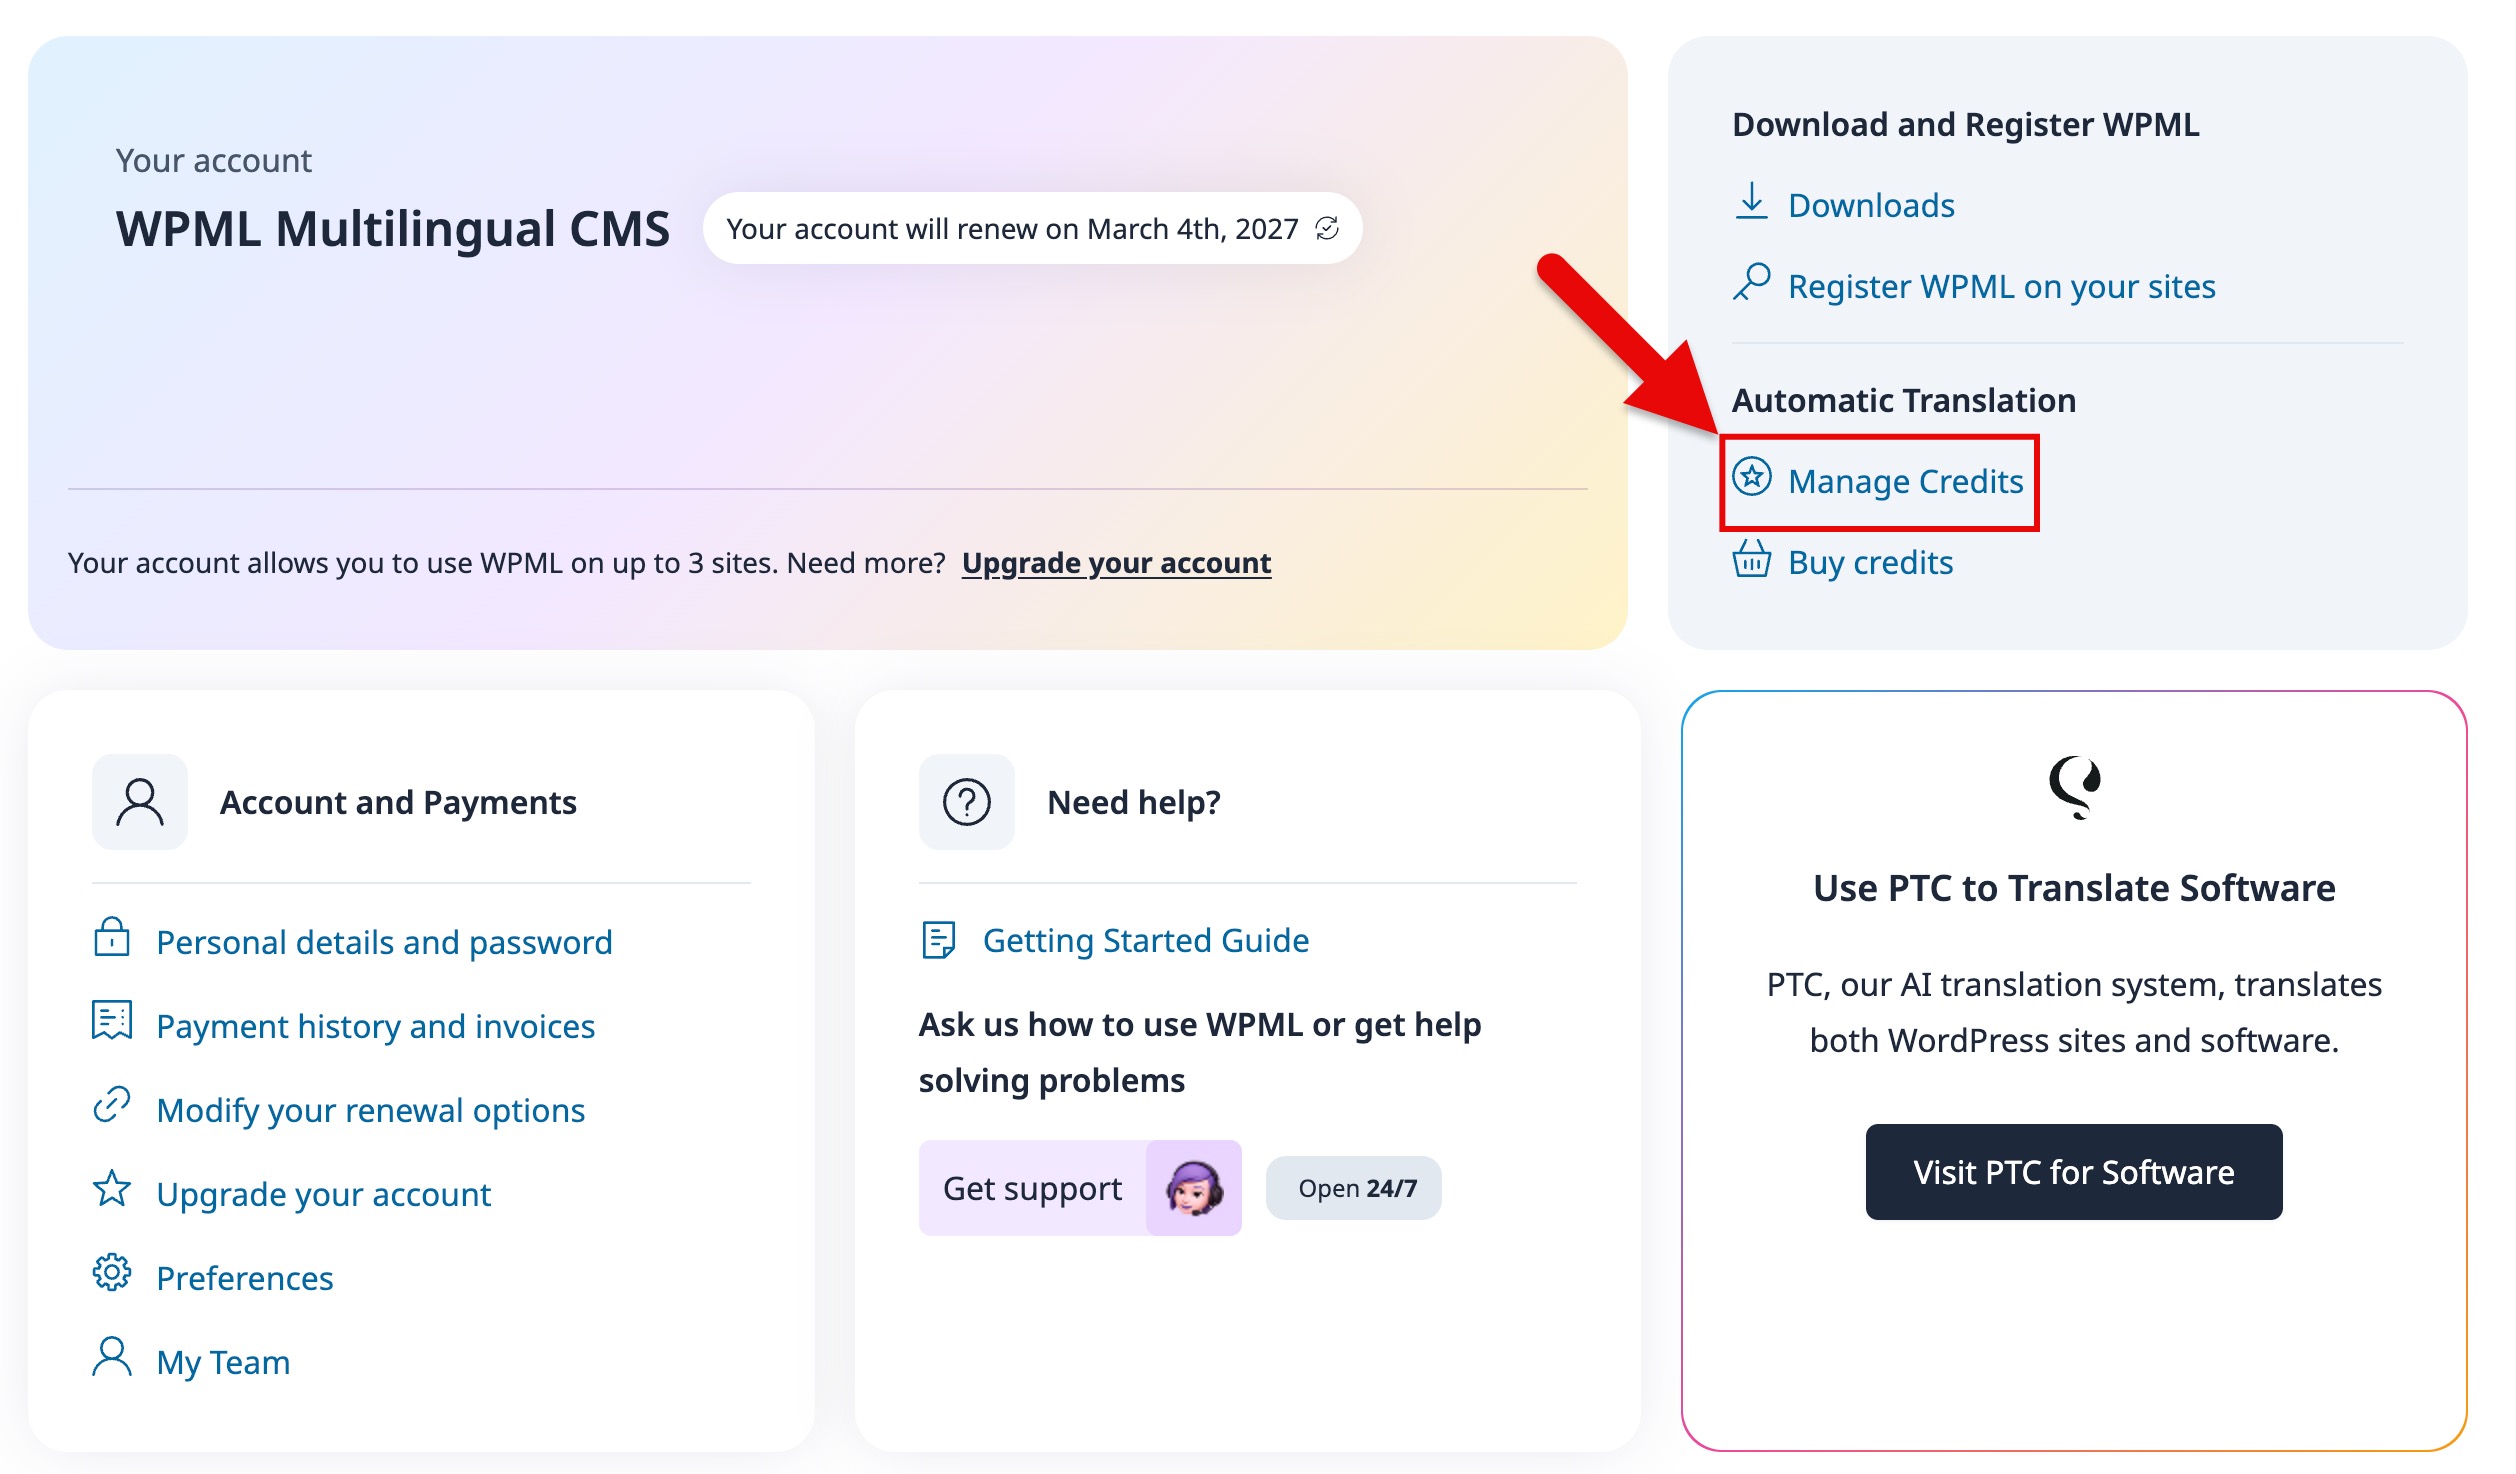
On your WPML account, click on Buy credits under the Automatic Translation section.
See and buy pre-paid credit packages.
Buying credits from your WPML account
Add or Remove Credits on Registered Sites
From your WPML account, you can assign credits you’ve bought to your registered sites. Once you assign credits, you can start translating automatically at that particular site.
Note: If you activate the Pay-As-You-Go pricing plan on a site, you don’t need to assign credits — you’ll pay only for the credits you use for translations. To assign credits to a site that has Pay-as-You-Go, you need to deactivate Pay-as-You-Go first.
To assign credits to your sites (or remove credits):
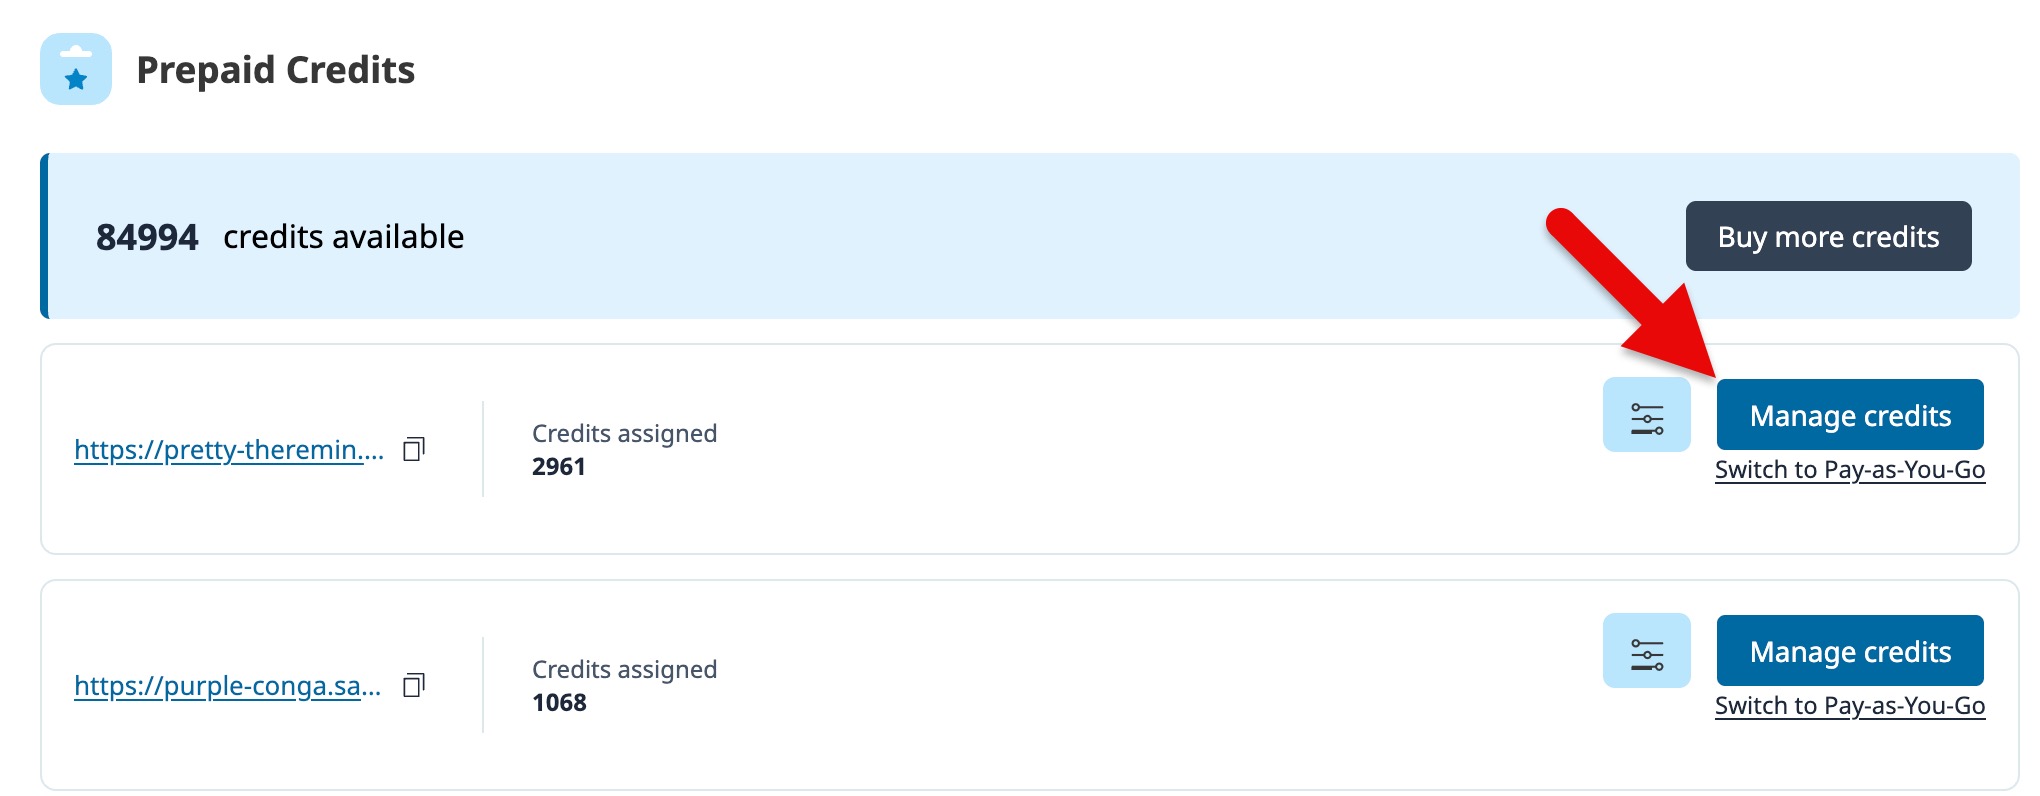
On your WPML account, click on Manage credits under the Automatic Translation section. This will show you the list of your registered sites along with how many credits each site has.
Managing credits from your WPML account
Click on the Manage credits button next to the site you want.
Clicking on the option to manage credits
In the popup that appears, choose to Remove credits or Assign credits and add the number of credits.
Selecting to remove or assign credits
Now, the credit balance for each site appears in your account and under Translation Tools on the WPML Translation Dashboard.
Sharing credits across sites
You can share credits among multiple sites by connecting them via a migration code. Follow our guide to connecting sites for credit sharing.
Managing Automatic Renewals for Your Subscription
How WPML Renewals work
By default, your account is set to renew automatically by charging your payment method on the expiration date. This renews your subscription for another year ensuring you get updates without issue. The date of renewal appears under Your account when you log in.
You can turn automatic renewals off or on at any time. If you turn them off, you’ll get a reminder to renew before your subscription expires.
Turning On Automatic Renewal
To turn on automatic renewal (for example, if you’ve turned it off before), click on Turn on automatic renewal under your subscription plan on the main screen of your WPML account.
Turning Off Automatic Renewals
To turn off automatic renewal:
Click on Modify your renewal options under the Account and Payments section on your WPML account. This will take you to the WPML Account Details page.
Click the Turn off automatic renewal link under your Payment Method. Keep in mind that turning off renewals may cause your account to expire if you don’t renew on time.
Renewing Manually
To renew manually:
Turn off automatic renewals from your WPML Account Details page.
Once you turn off automatic renewals, you’ll see the link Renew for another year on the same page. Click on this link and confirm the renewal.
You can turn automatic renewal back on after you renew manually, too.
Canceling Your Subscription
If you don’t want to continue updating WPML, you can simply turn off automatic renewals. Then, let your subscription expire on the expiration date.
Seeing Which Card/Payment Method Is Saved In Your Account
To view which payment method will be charged for renewal or credits:
On your WPML account, click on Modify your renewal options under the Account and Payments section. This will take you to the WPML Account Details page.
On the right-hand side, you’ll see the saved payment method. To modify the payment method, click on Change Payment Method and add a new credit card / PayPal account or Credit / Debit Card.
Here, you can also view all orders and request a refund. Refunds are possible within 30 days of purchasing. Click on Get a refund to request a refund for an order or open a support ticket to resolve any issues.
Upgrading Your WPML Subscription
If you have a WPML Multilingual Blog or WPML Multilingual CMS subscription, you can upgrade your account to get access to more features and register more sites.
To upgrade your account:
On your WPML account, click on Upgrade your account under the Account and Payments section.
Select the subscription plan you want to upgrade to.
Fill out billing details and payment method, and click Place Order.
Selecting Default Language for Support
To select the default language you want to receive support in:
On your WPML account, click on Preferences under the Account and Payments section.
Under Support Language, choose your default language. The available languages are currently English, Arabic, German, Spanish, French, Hebrew, Italian, Portuguese, Russian, and Chinese.
Enable notification emails when you receive a response to a support ticket you opened.
From the Preferences page, you can also select your preferred Translation Service. You still need to connect this service via the WPML Translation Dashboard to be able to send them content for translation.
Add, Edit, and Delete Users from your Account
Adding a new user to your account gives them their own login credentials. There are three roles you can assign to a new user:
Developer – For people building sites using WPML
Finance manager – The person who will manage the subscription and payment method
Content manager – For people managing the site’s translations
To add a user:
On your WPML account, click on My Team under the Account and Payments section.
Add a new user’s email address, assign their role (Content Manager, Developer, or Finance Manager) and click on Add user.
To remove a user:
On your WPML account, click on My Team under the Account and Payments section.
Hover over a user and a trash icon will appear at the top right. Click on the trash icon to delete the user.