To translate menus that link to content (pages, posts, etc.) you simply need to translate the content the menu links to:
Go to WPML → Translation Dashboard.
Locate the content your menu links to and select your items.
Choose a translation method and click Translate.
Translating Menus Built with Site Editor
To translate menus built with Site Editor:
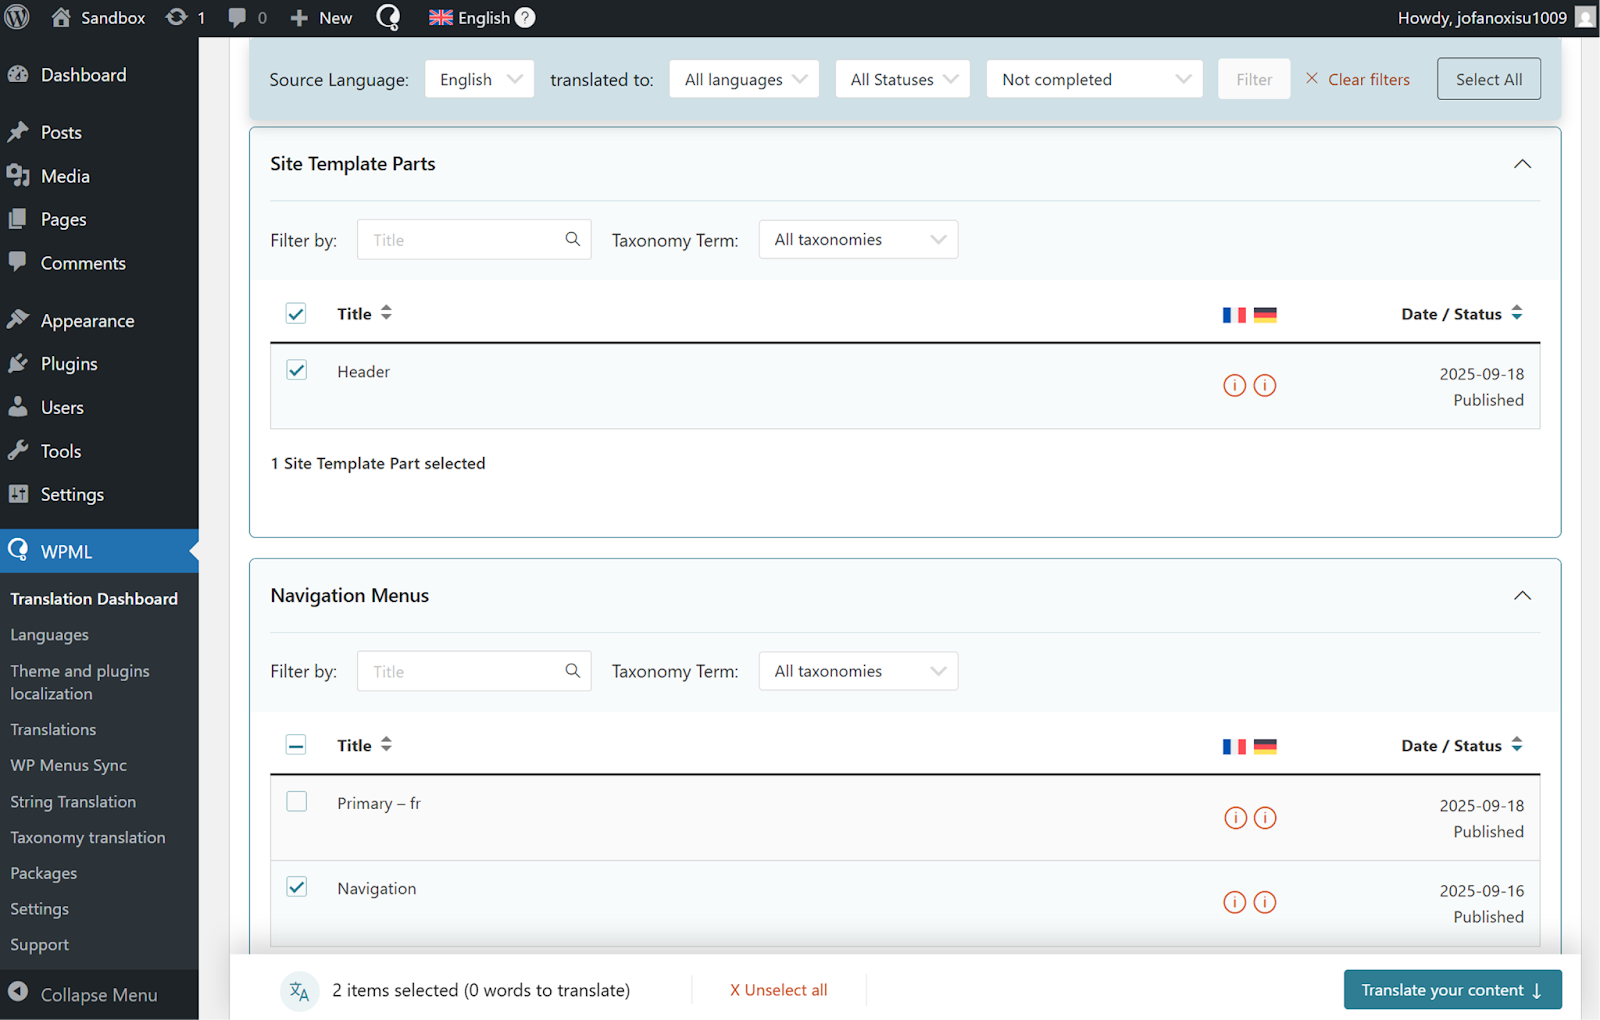
Go to WPML → Translation Dashboard.
Open the Site Template Parts section and select the template containing your menu (Header, Footer, etc.)
Next, open the Navigation Menu section and select your navigation menu block (e.g., Navigation).
Choose a translation method and click Translate.
Choosing template containing the navigation block and menu
Translating Menus with Custom Links
Menus with custom links are those you add in Appearance → Menus, under the Add menu items area in the Custom Links section.
Custom Links section
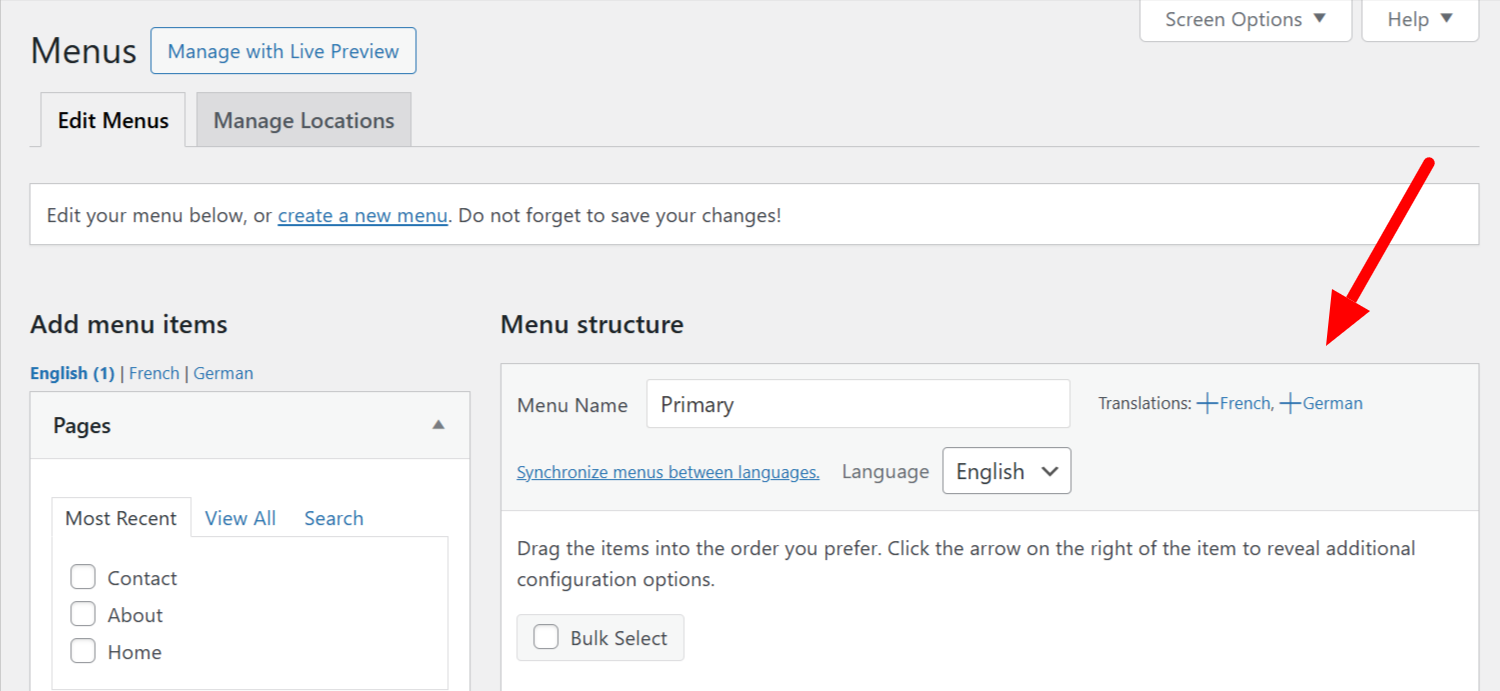
To translate menus with custom links you need to create a new menu in your target language:
Go to Appearance → Menus.
Under Menu structure, click the language link you want to create a new menu for (e.g., +French).
Selecting language for new menu
Give your new menu a name (e.g., “Primary – fr”) and choose the location to display it (e.g., Primary Menu). Click the Create Menu button.
Under the Add menu items on the left, select the content you want to add to your new menu and click Add to menu.
For custom link menus, open the Custom Links section and create a new one with a translated URL.
Click the Save Menu button to publish your menu.
Your new menu will now display translated custom links when switching languages.
Frequently Asked Questions
Can I have menus with different items in each Language?
Yes, you can have menus with different items in each language. Follow the steps under the custom links section to create different menu layouts per language.
How Can I Sync Menus Into Other Languages?
WPML’s WP Menu Sync feature lets you quickly synchronize your original menu structure to other languages, ensuring your menus stay consistent in all languages. This feature is useful when you edit your original menu, and want to quickly update menus in other languages all at once.
To sync menu items across languages:
1. Make sure that the content linked from your menu items is translated. 2. Go to WPML → WP Menu Sync. 3. Click the Sync button. 4. Select the new items you want to add to your menus. 5. Click the Apply changes button.
Menus in other languages will now include the new items you selected.