


Elementor keeps your site name, tagline, colors and fonts in one place, Site Settings. WPML translates the two texts there, and only those, so every language keeps the design you built once. Change a color once and every language shows it. For the full Elementor setup, read how to translate an Elementor website with WPML.
The Elementor Site Settings That WPML Translates
Elementor stores Site Settings in a kit: one hidden template that holds the whole design (colors, fonts, layout) together with the site name and tagline. Translating the kit would create a second design for each language.
So WPML keeps the kit out of translation and out of the list of Elementor templates. It sends only the two texts, as one item called Site Settings. The texts translate, and the design around them stays one.
What You Need to Do
With Translate Everything On: Nothing
If you use PTC and your site is on Translate Everything, WPML translates the whole site, the site name and tagline included. You do not need to do or review anything. When you change them later, WPML translates the change too.
You set it up in the Translate Everything Automatically box at the top of WPMLTranslations. Read how to translate everything automatically.
With Translate Everything Off: Send Site Settings from the Translation Dashboard
You choose what to translate and when. You send the Site Settings item like any other content.
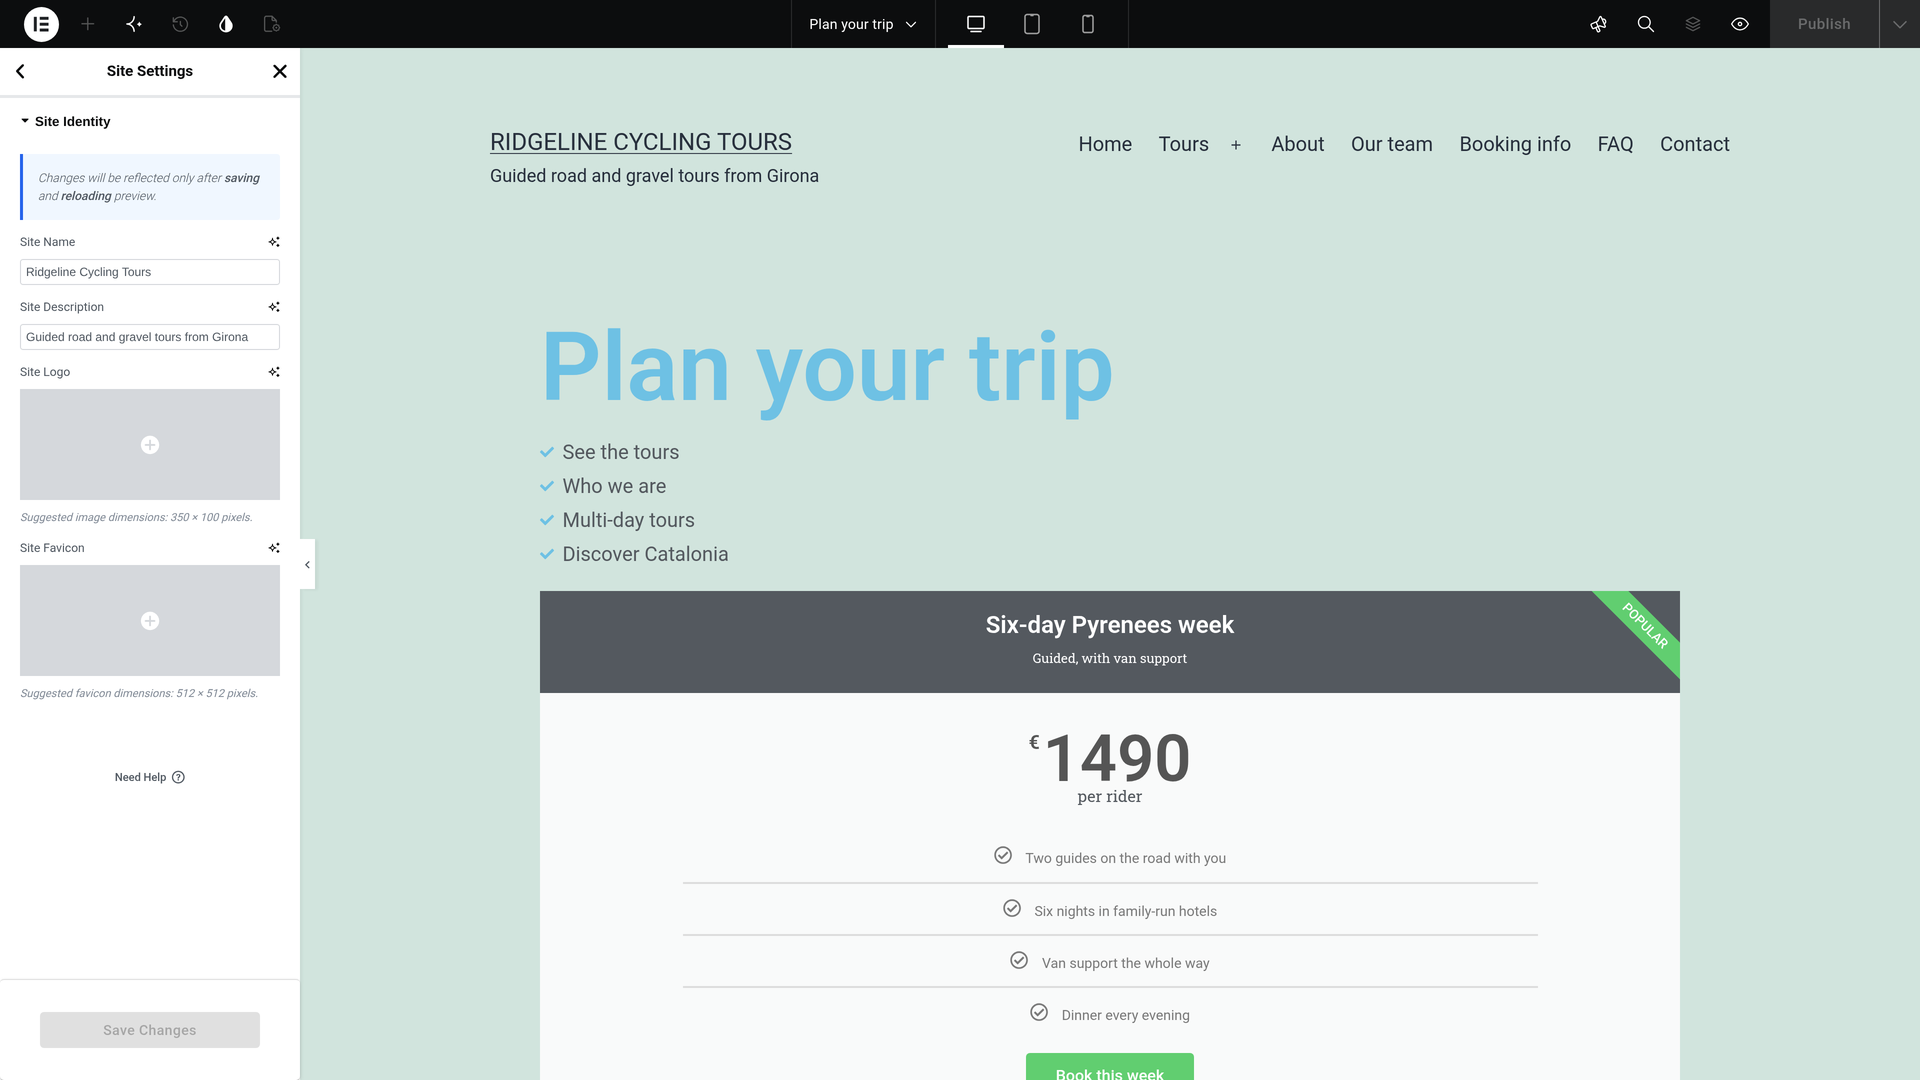
- Save Site Settings once. In Elementor, open Site Settings and then Site Identity. Enter the Site Name and the Site Description, which is your tagline, and save.
- Open the Translation Dashboard. Go to WPMLTranslations. The Translation Dashboard shows a section called Site Settings with one item, also called Site Settings. It is not under Elementor Templates.
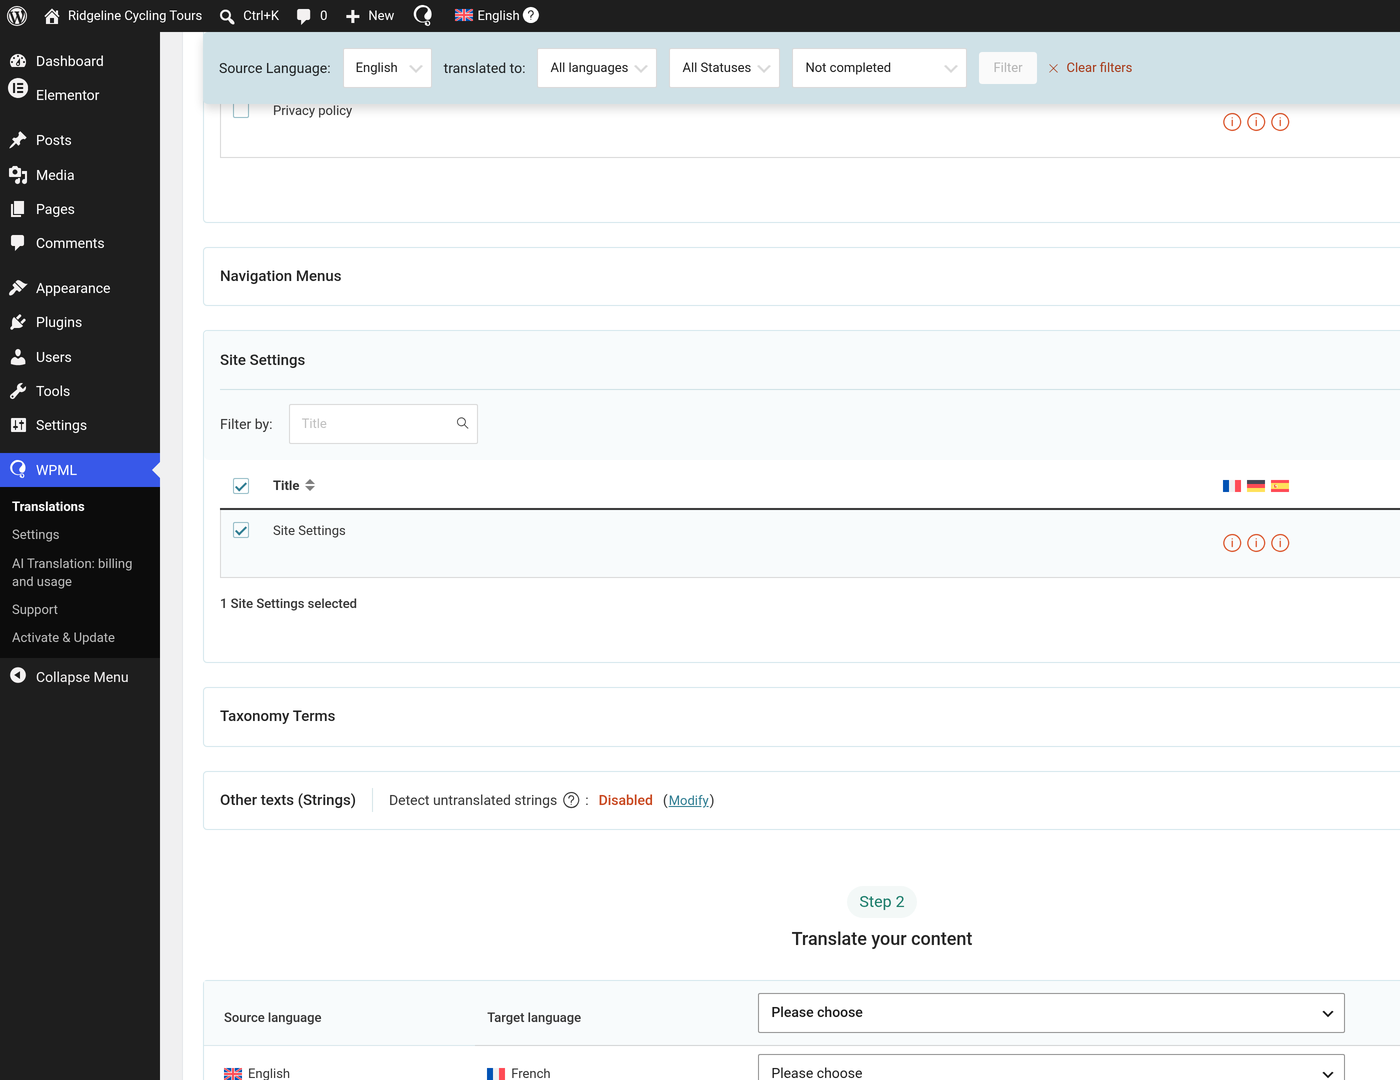
- Select the Site Settings item. Check the box next to it.
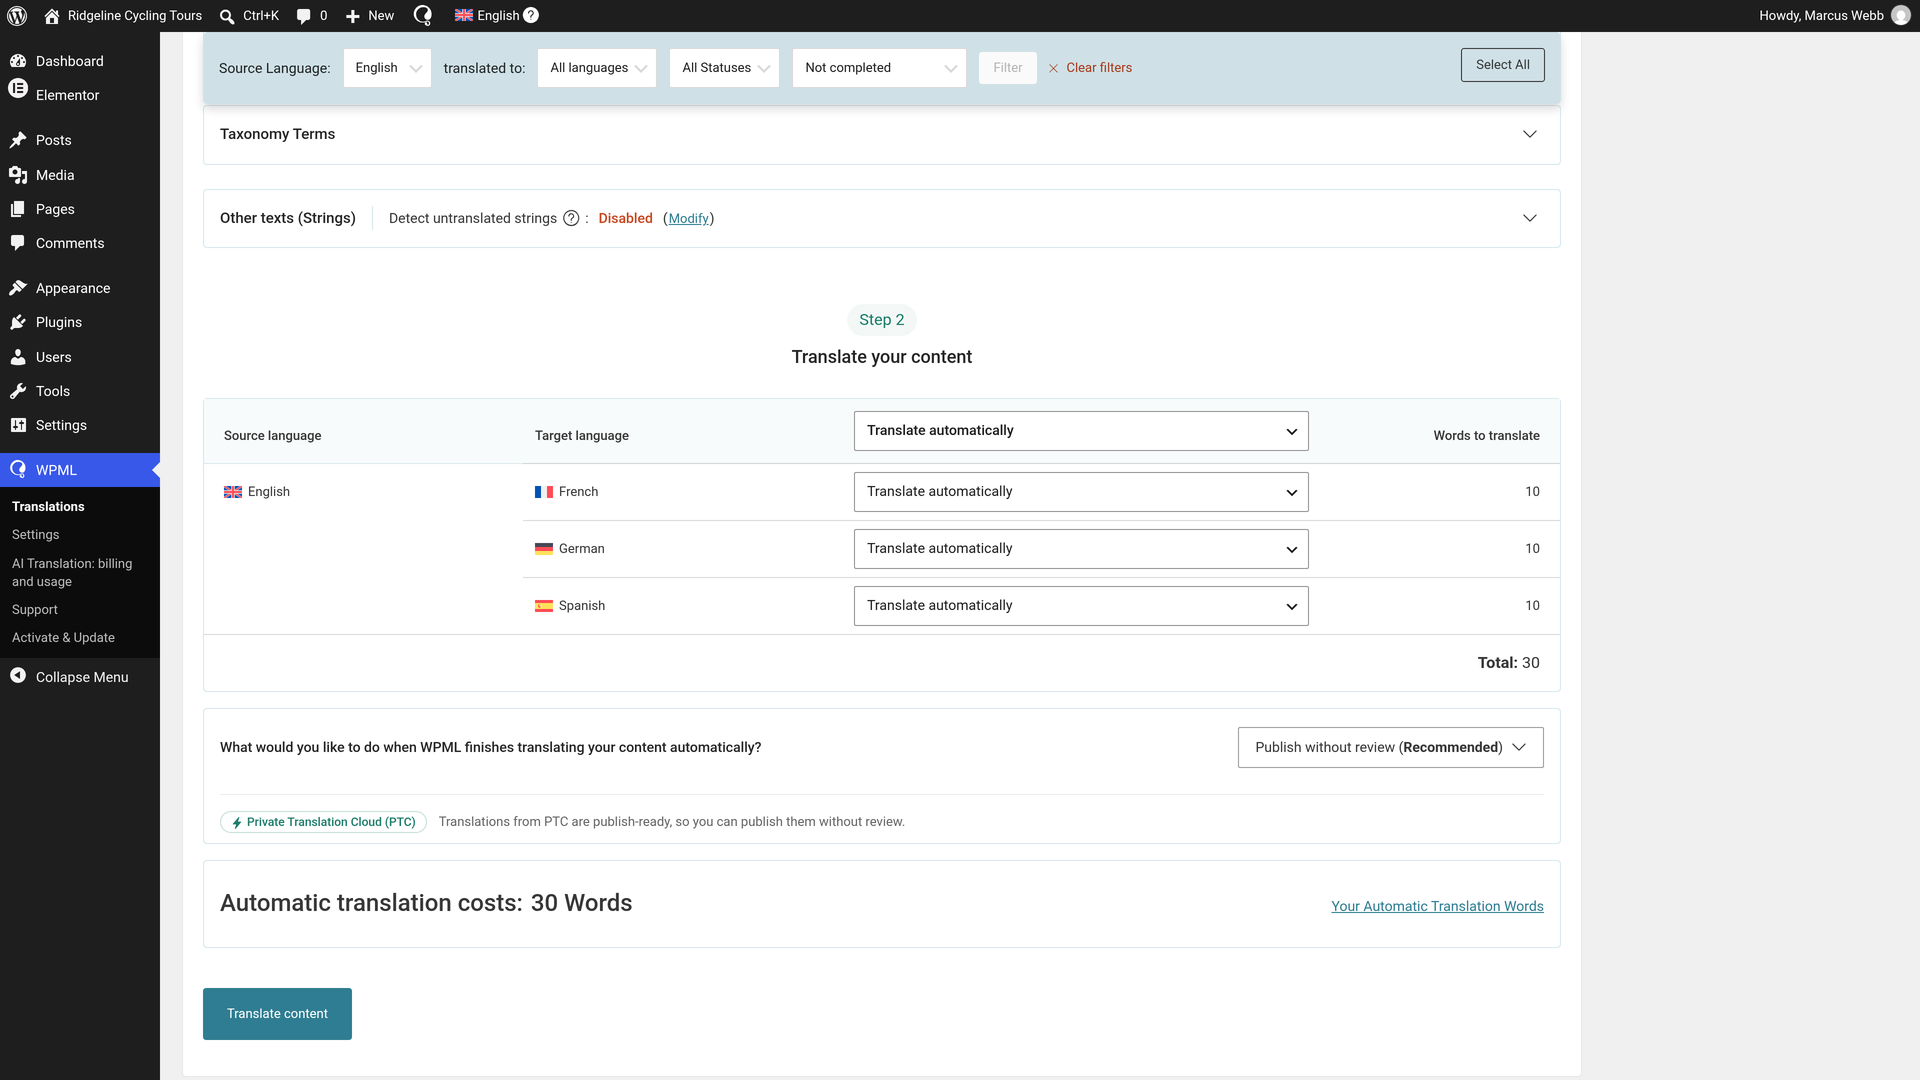
- Choose automatic translation. Under Translate your content, choose Translate automatically for each language.
- Choose Publish without review. Under What would you like to do when WPML finishes translating your content automatically?, choose Publish without review (Recommended). Translations from PTC are ready to publish, so they go live as soon as they are done.
- Send it. Click Translate content. A popup confirms Sent for translation.
The translations complete in minutes and are live. In Translation Jobs, each job shows Completed. There is nothing more you need to do.
Read more about the Translation Dashboard.
Where Visitors See the Translated Site Name and Tagline
When the translation is complete, visitors see the translated name and tagline everywhere your site shows them:
- the site title in your header
- a site title you typed into a header's Site Title widget (read how to translate Elementor Pro headers and footers)
- the browser tab
- the feeds
Saving Site Settings later does not undo the translation.
See the Translated Site Name and Tagline
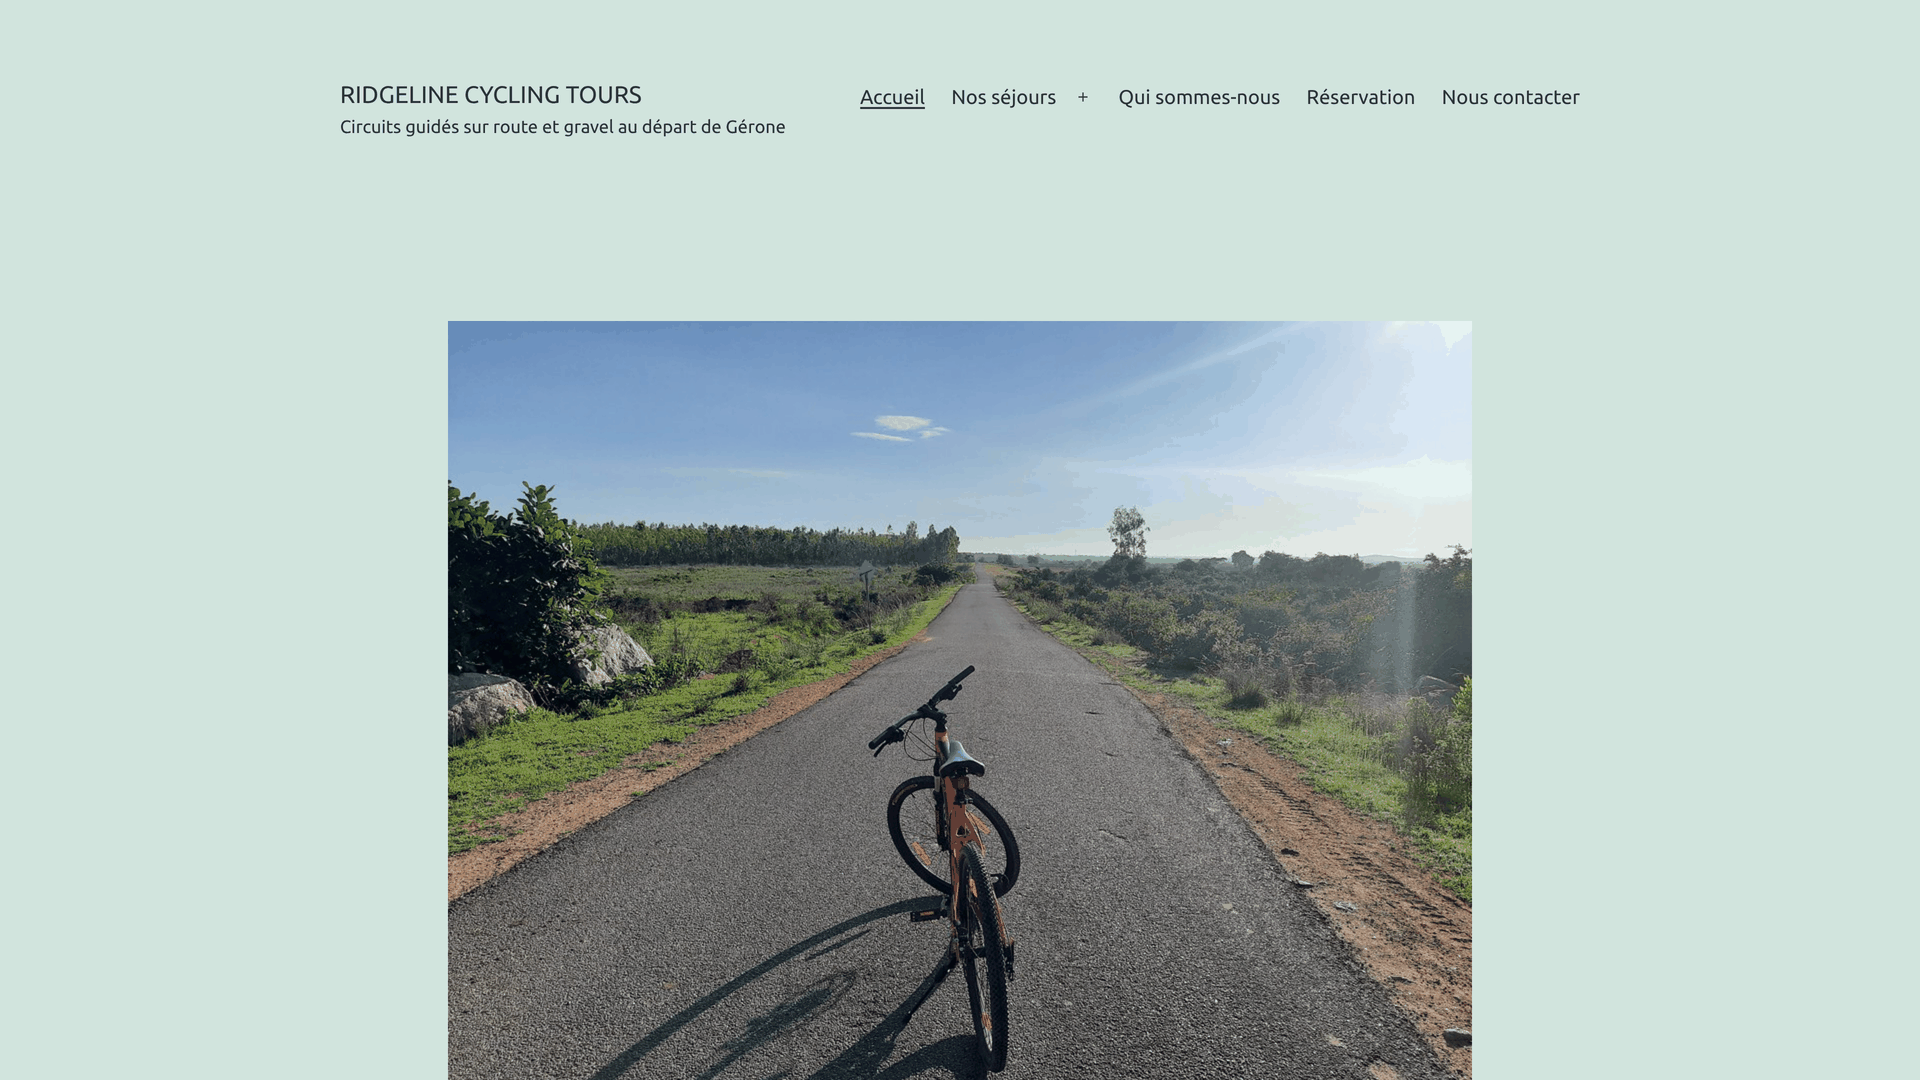
You can look at the translations to see for yourself. Visit your home page in any of your other languages. The header shows the site name and the tagline of that language.
If You Want to Change a Translation or Translate the Site Name and Tagline Yourself
You do not need to check anything. If you want to change a text, do it this way:
- Open Translation Jobs. Go to WPMLTranslationsTranslation Jobs.
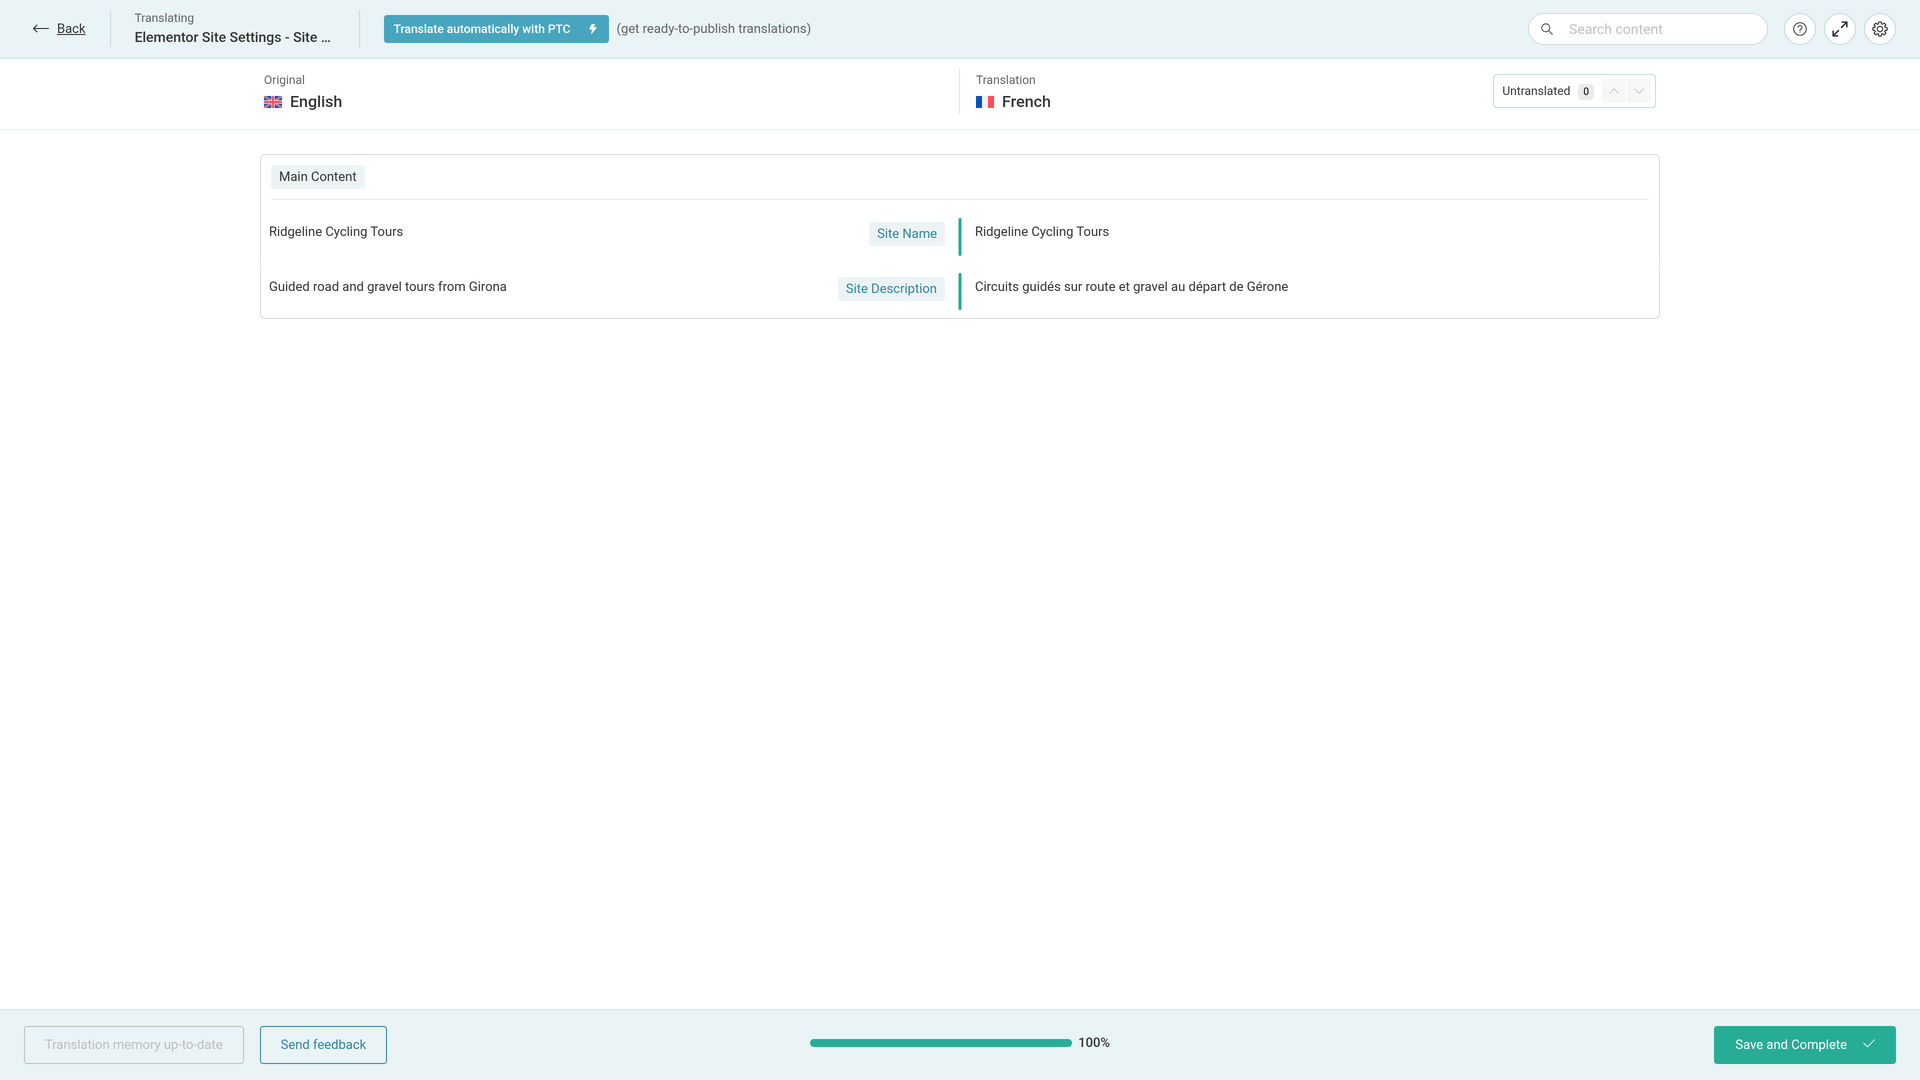
- Click the pencil on the job's row. Use the row of the language you want. The pencil's title is Edit Translation. The Advanced Translation Editor (ATE) opens with two rows, Site Name and Site Description.
- Edit what you want. Change either text in the editor.
- Click Save and Complete. Always finish this way, even with no change. Otherwise the job stays In progress.
When you use PTC, it learns from your edits, so you do not need to keep making the same corrections.
Translate the Site Name and Tagline Yourself
To translate them yourself from the start, choose it when you send the Site Settings item:
- Send the Site Settings item from WPMLTranslations as above. In the Dashboard's step 2, choose Translate myself instead of Translate automatically.
- The job then waits in the Translation Tasks tab. Click Translate on it.
- Translate the two rows in the Advanced Translation Editor and click Save and Complete.
What You See in the Translation Editor
Both rows sit in the Main Content group. In our example, French, automatic translation gave these texts:
| Original | Label in the editor | Translation (our example) |
|---|---|---|
| Ridgeline Cycling Tours | Site Name | Ridgeline Cycling Tours |
| Guided road and gravel tours from Girona | Site Description | Circuits guidés sur route et gravel au départ de Gérone |
A brand name in the site name usually stays as it is, while the tagline translates. You can change either row in the editor.
When You Change the Site Name or Tagline
Change the name and tagline in Elementor's Site Settings, not in WordPress's general settings, so the translations follow.
- With Translate Everything on, a new name or tagline translates again by itself.
- With Translate Everything off, go to WPMLTranslations and send the Site Settings item again.
What Stays One Design for Every Language
Everything else in Site Settings is the same in every language:
- global colors and global fonts
- the layout, the lightbox and the background
- the element defaults
- the logo and the favicon
Change a color or a font once, and every language shows it. There is nothing to translate or send again.
The favicon is one image for every language. For the rare site that needs another one per language, read how to translate favicons.
Building a site for a software company? The same translation system also translates the product's documentation and user interface with Private Translation Cloud (PTC) for software.
