WPML is the most popular multilingual plugin for WordPress, with over 1,000,000+ active installations. In this guide, you’ll learn how to use WPML to translate your website into as many languages as you want – in just five steps.
1. Choose Target Languages
The first step is choosing which languages you want to translate into. WPML supports over 65+ languages and lets you choose as many as you want during the setup wizard.
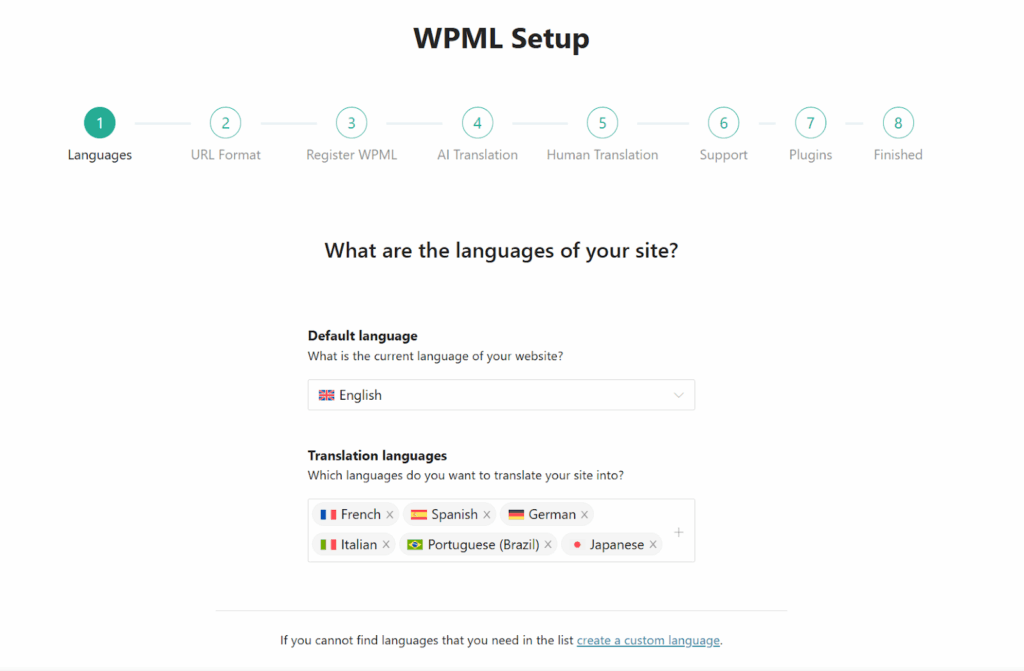
If at this point you still haven’t decided the full list of languages you want to translate into, don’t worry – you can always add more later.
2. Configure Your AI Translator
AI translation is the best method for translating your website. It’s faster than human translators, and produces better results than traditional machine translation.
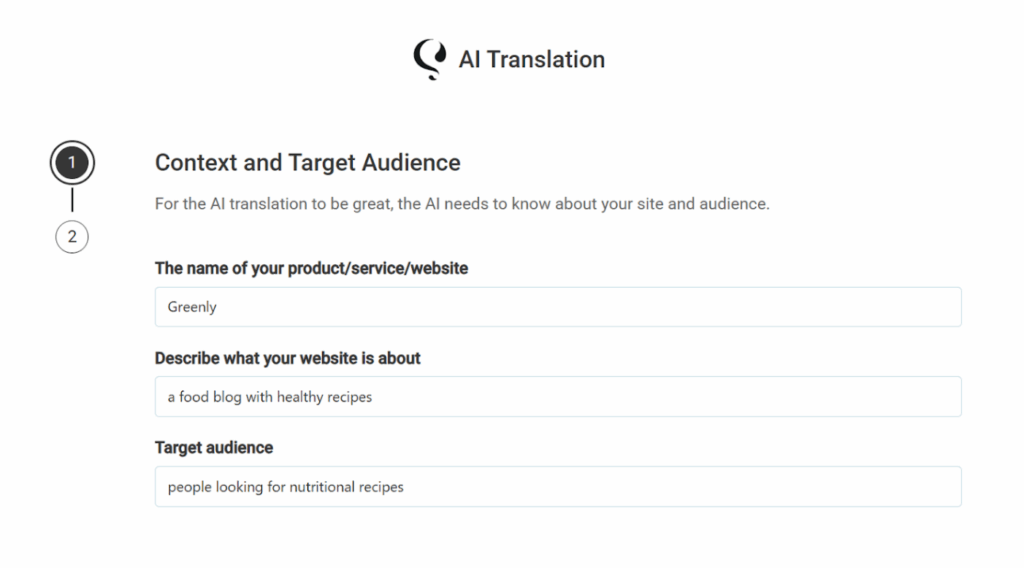
WPML uses AI translations by PTC, its own custom-built translator that can create translations using your terminology, language style, and even formality. To achieve this level of personalization, PTC uses your entire website as context, and information you provide it during setup.
Besides a highly accurate AI translator, WPML also includes three additional benefits when translating automatically:
Guaranteed quality
Get a full refund if you’re not satisfied with PTC’s translations.
Affordable translations
Translate for less than €0.002 per word.
Translations are yours
Translations are stored on your site and remain yours.
3. Translate Your Content
WPML lets you translate your entire website from a single screen called Translation Dashboard. This includes pages, posts, and custom posts, as well as content coming from other plugins, like forms, WooCommerce products, and templates.
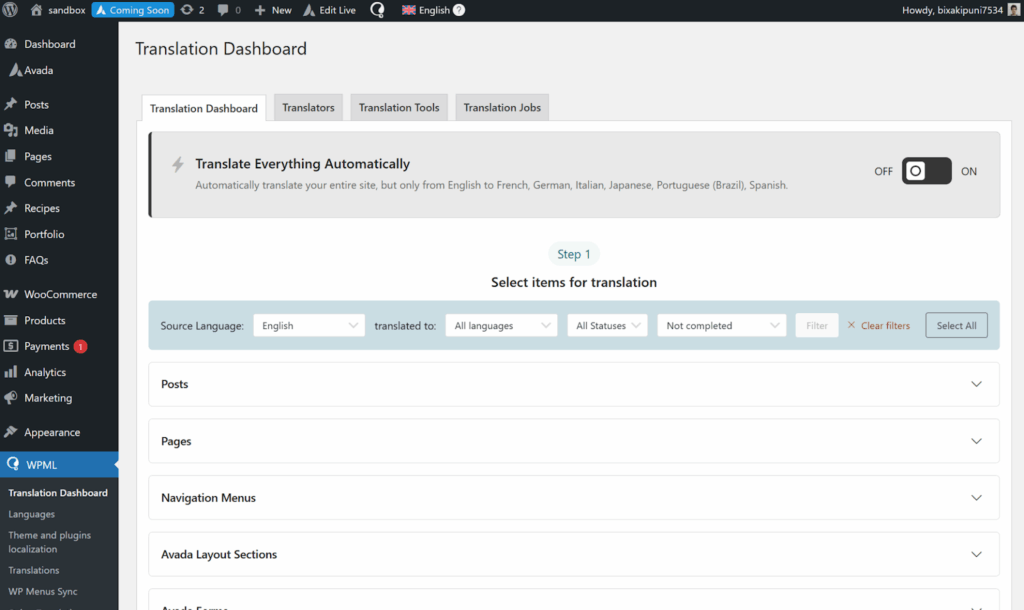
To translate content, just go to WPML → Translation Dashboard and select the items you want to translate.
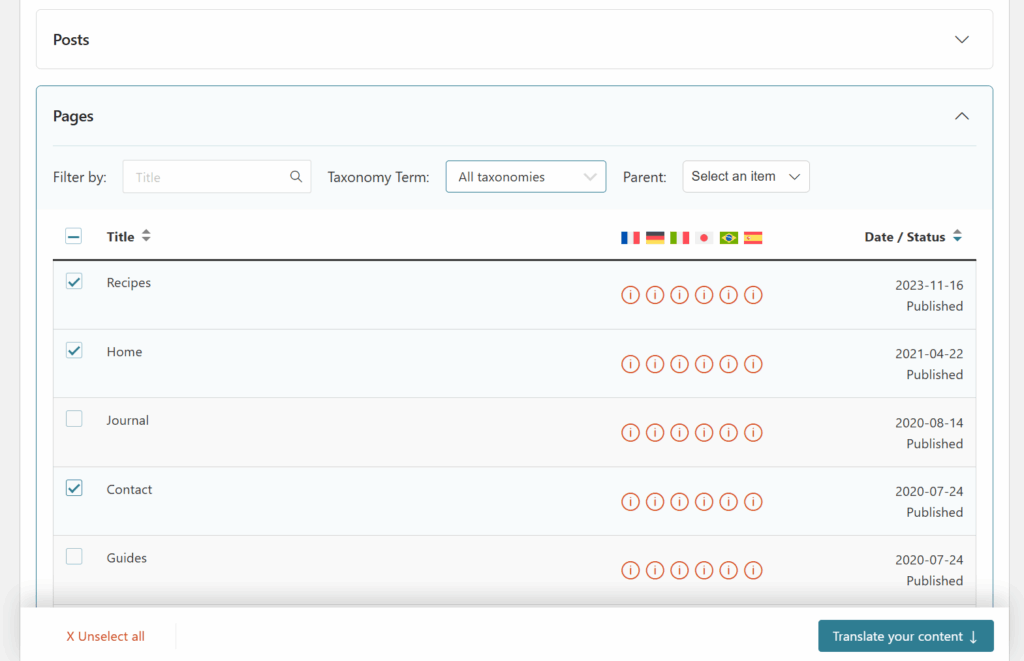
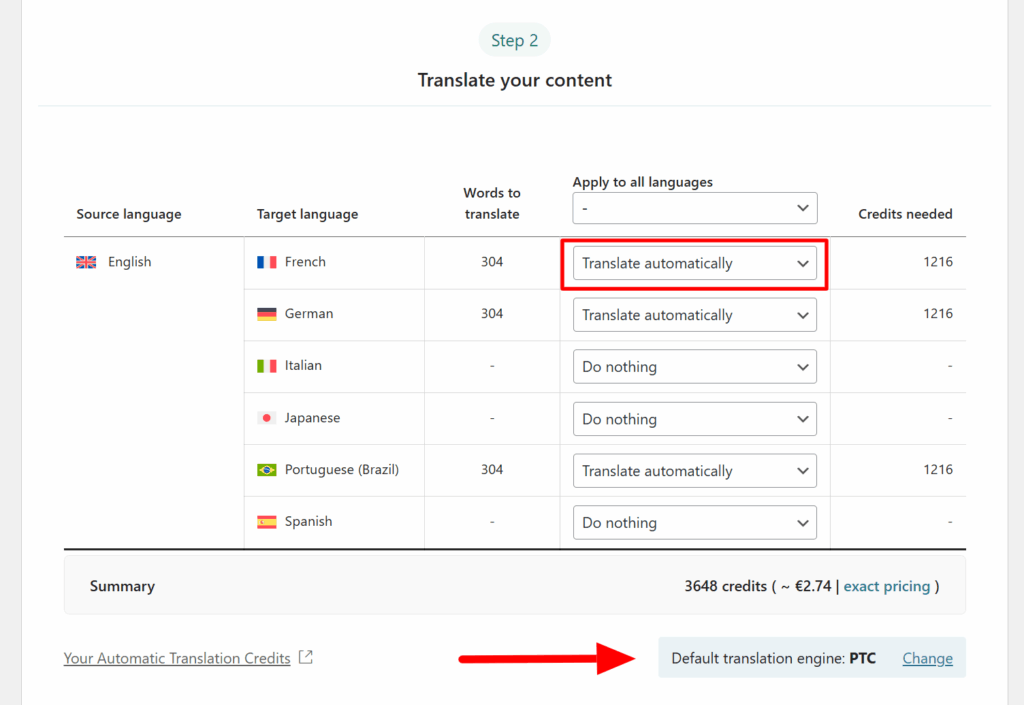
Next, choose your translation method – to use PTC, select Translate automatically and make sure your engine is set to PTC.
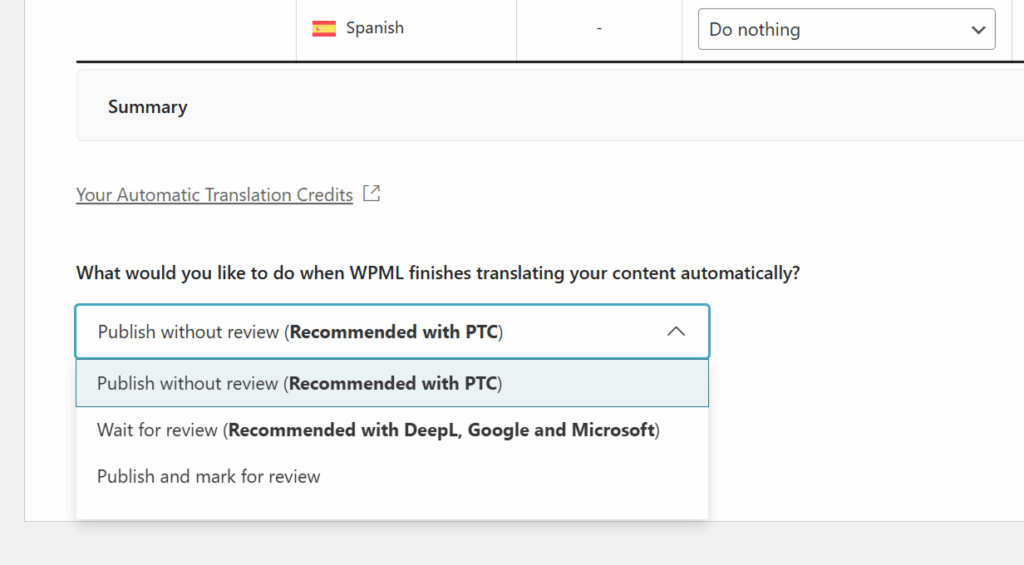
Finally, choose whether you’d like to review completed translations and click Translate. Since PTC can create excellent translations, reviewing them is optional.
Once PTC is done, your translations will appear on your website when switching languages.
4. Translate Everything Automatically
Translating your entire website can be time consuming – especially if you have many pages. To skip the manual work, WPML has a feature called Translate Everything Automatically which does two things:
- Translate everything – automatically translate every single page on your website
- Update translations – automatically retranslate content when you edit the original language
To enable Translate Everything Automatically, go to WPML → Translation Dashboard and click the toggle at the top of the screen.
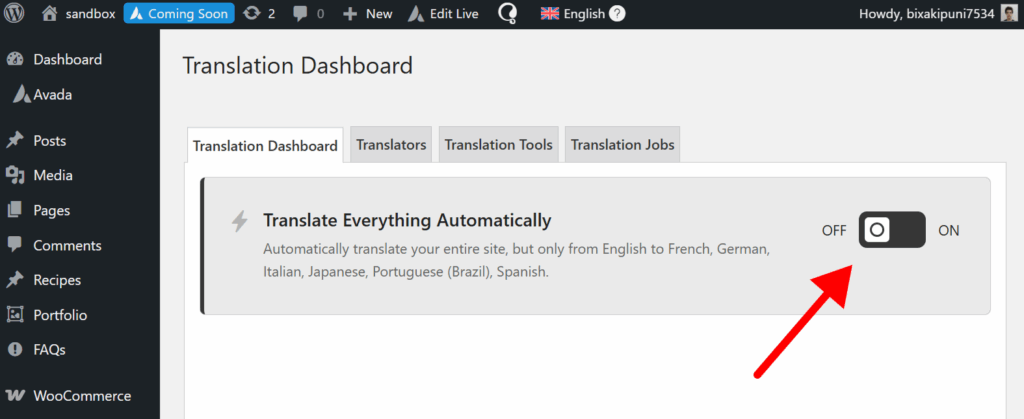
This will open a pop-up asking you what content to automatically translate; any existing untranslated content, or only new content you publish after enabling this mode.
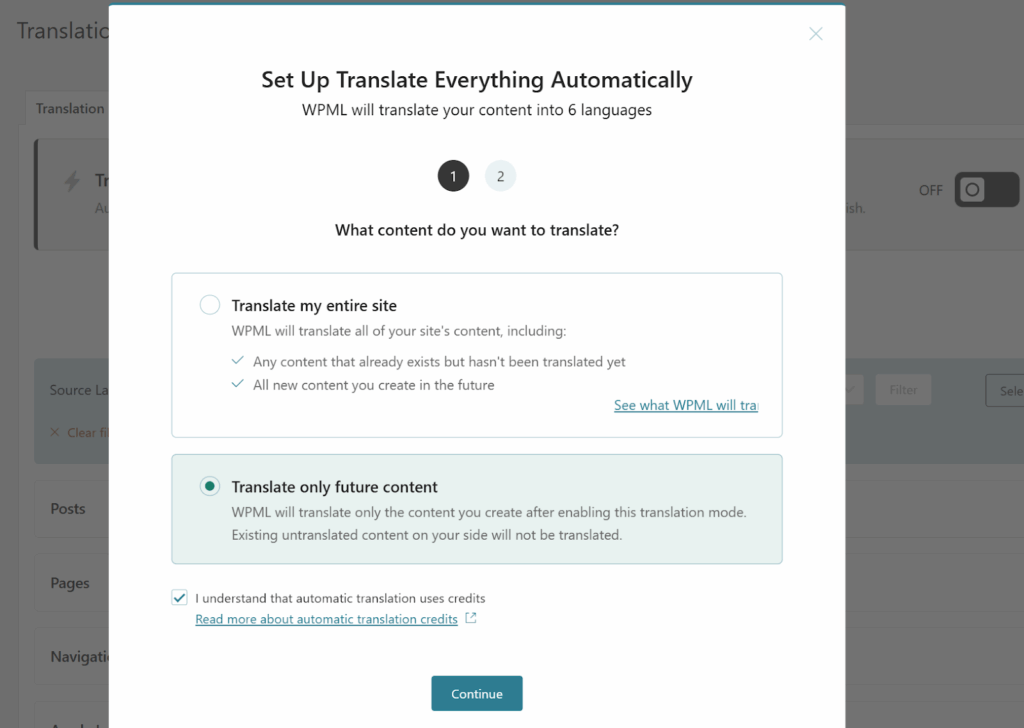
Once you confirm your preferences, WPML will start translating your content, indicating the progress at the top of the dashboard.
5. Add a Language Switcher
So far we covered how to translate a website. Now, it’s time to let visitors choose their preferred language. While WPML offers automatic redirection, we recommend letting visitors manually select their language using a language switcher.
By default, WPML shows a switcher in the footer when a page has translations.
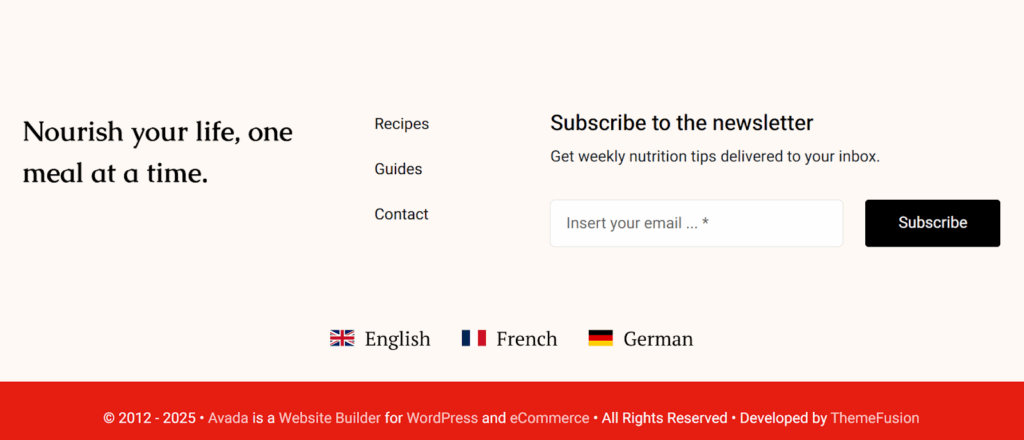
However, you can also show a switcher in other parts of your site, like the menus area.

To add a language switcher, first go to WPML → Languages and scroll down to the language switcher settings. From here, you can add a switcher to menus, widgets, and even a page’s body content.
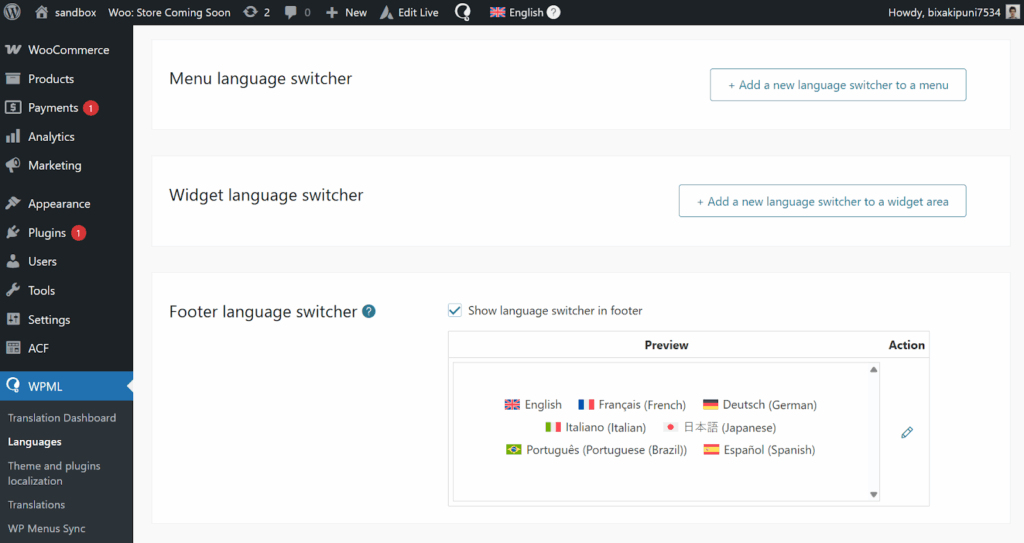
Just click the button where you want to add a switcher to, and customize its appearance.
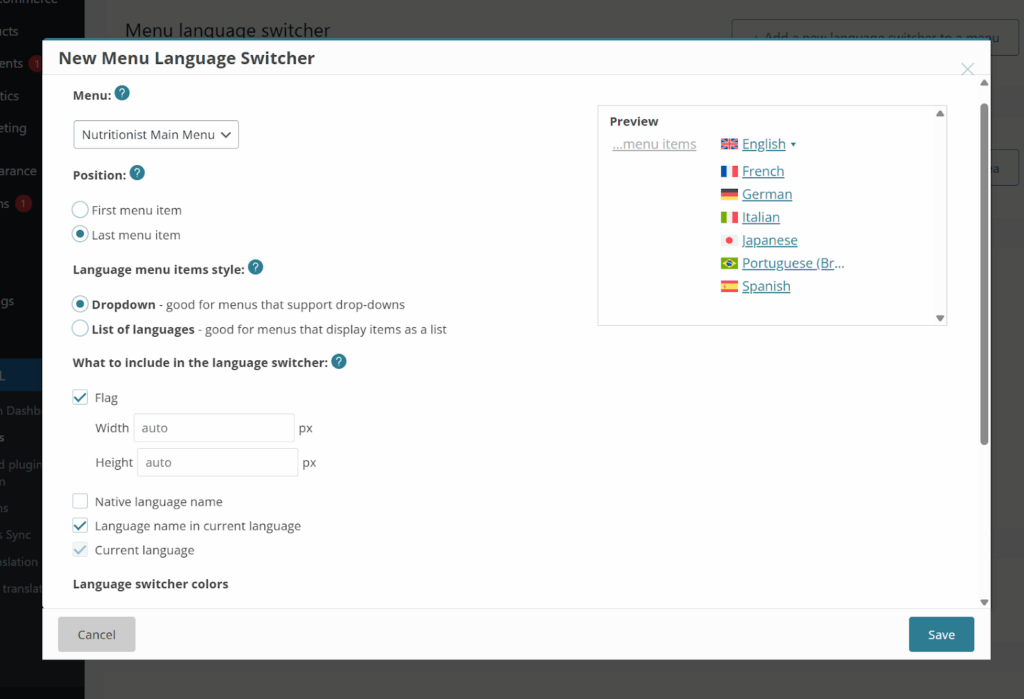
WPML includes multiple customization options:
- Display as dropdown or horizontal list
- Set background color
- Show / hide flags
- Display language in native name
Besides the default customization settings, you can also add your own custom CSS to create a unique language switcher. Here’s a few examples:
For more details, see WPML’s guide for adding a language switcher on your website.
Alternative Translation Engines
While we highly recommend using PTC, you can also translate with three other translation engines, ranging in quality and features.
| Translation Engine | Quality | Key Feature |
|---|---|---|
| PTC | Human-quality | AI-powered translations |
| DeepL | Very good | Control language formality |
| Google Translate | Good | Most available languages |
| Microsoft Translator | Good | Most affordable |
To use a different translation engine, click the Change link under Step 2 when sending content for translation.
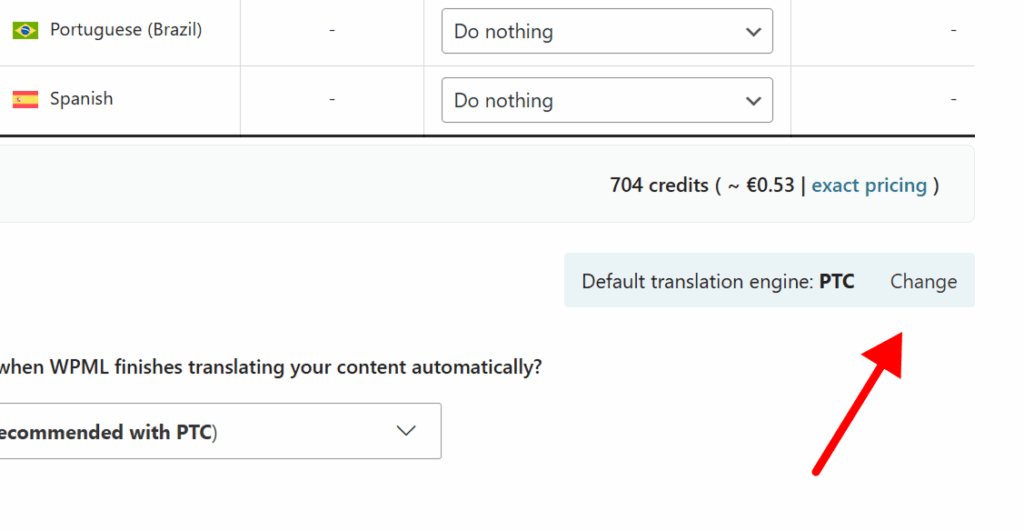
If you don’t want to use automatic translation at all, WPML also lets you translate by yourself. Since this method is highly time consuming, we recommend using a hybrid approach; use automatic translation to create a first draft, and then follow up with a manual review.
Bonus: Optimize for Multilingual SEO
Optimizing for multilingual SEO can help your website rank higher in other languages and attract more international traffic.
Below are a few optimization tips to keep in mind – you can find the complete list of recommendations on our multilingual seo guide.
Use Language Directories for URLs
Language directories are easy to set up, and help search engines easily understand which language each page is in. For example, here’s what an “About” page could look like in a Spanish directory:
- example.com/about/
- example.com/es/sobre/
Use in WPML
When setting up WPML, you can choose from various URL formats: language directories, subdomains, and even different domains per language.
Implement Hreflang Tags
Hreflang tags help search engines find your translated versions and understand your website structure. Every page should have an hreflang tag that links to its translated version, and vice versa – each translation should link back to the original content.
Use in WPML
WPML automatically adds hreflang tags, so you don’t need to manually handle this yourself. Even as you add translations or move pages, WPML automatically updates your hreflang tags.
Translate URL Slugs
Translating URL slugs helps search engines understand your content in each language, and makes URLs more user-friendly for international visitors. Here’s an example:
- example.com/blog/best-summer-destinations/
- example.com/blog/es/mejores-destinos-de-verano/
Use in WPML
By default, WPML automatically creates a translated URL slug when you translate content. However, you can also specify your own translated URL slug if you want.


