Translating your website can help you rank in other languages, build trust among your readers, and communicate ideas more clearly. Whether you want to increase your traffic, conversions, or engagement, translating your site is a great method for achieving all three.
Choose a Multilingual WordPress Plugin
The easiest way to translate your WordPress website is using a multilingual plugin, like WPML. Among WordPress users, WPML is the most popular multilingual plugin, with over 1,000,000+ active installations.
In addition to translating your content, WPML also includes:
Automatic Translation
Translate your website with machine translation
Multilingual SEO
Optimize translated content to rank higher on Google
Unlimited Languages
Translate your website into as many languages as you want
1. Setup WPML
WPML comes with a short setup wizard to help you configure the basic settings.
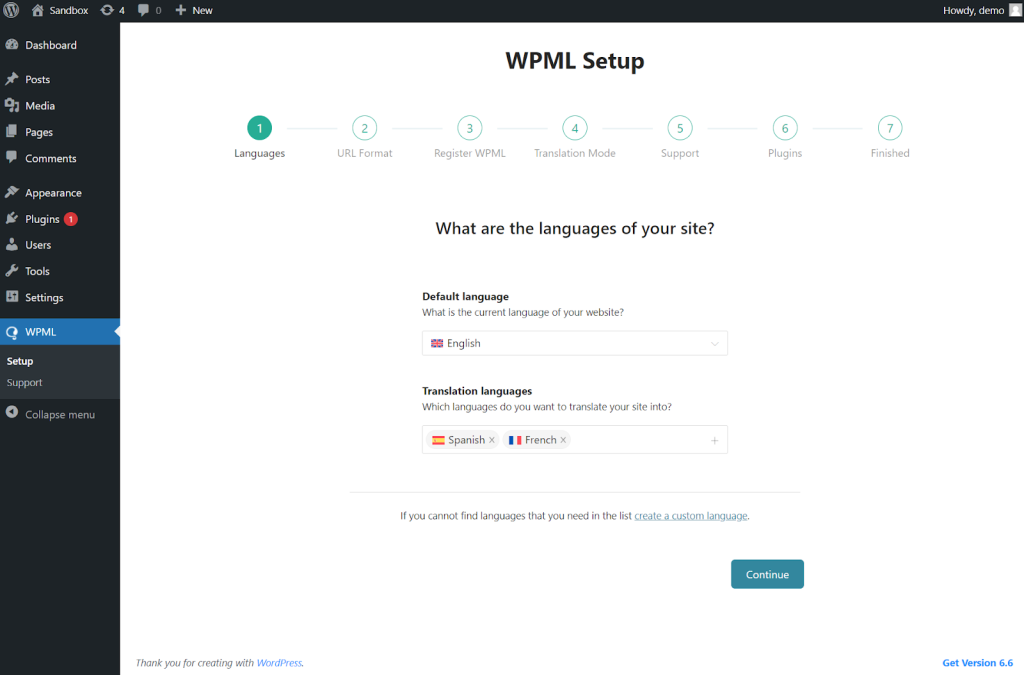
During the setup wizard, you can choose:
What languages to add
Choose from over 65 pre-configured languages, or add your own custom languages.
How to format URLs
Organize translations under subdomains, subfolders, or different domains per language.
Who will translate
Manage translations by yourself, with other users on your site, or with external translators
2. Translate Your Website
With WPML, you can translate any element on your website. This includes:
- Pages
- Posts
- Custom posts
- Taxonomies
- Forms
- Widgets
- Products
To translate any element with WPML, go to WPML → Translation Management, select the content you want to translate, and send for translation.
To achieve the best translation quality, we recommend using WPML’s automatic translation – see the short tutorial below to learn how it works.
WPML currently supports four translation engines, ranging in price and translation accuracy:

WPML AI
Most accurate

DeepL
Most customizable

Google Translate
Most languages

Microsoft Azure
Most affordable
While all engines can create good translations, we recommend using WPML AI, our better than human translation engine powered by ChatGPT.
3. Review and Publish
Before publishing translations, WPML lets you preview how they look on the front end.

If you’re satisfied with translations, you can publish them to your site. If you want to make changes, you can edit translations using the Advanced Translation Editor.
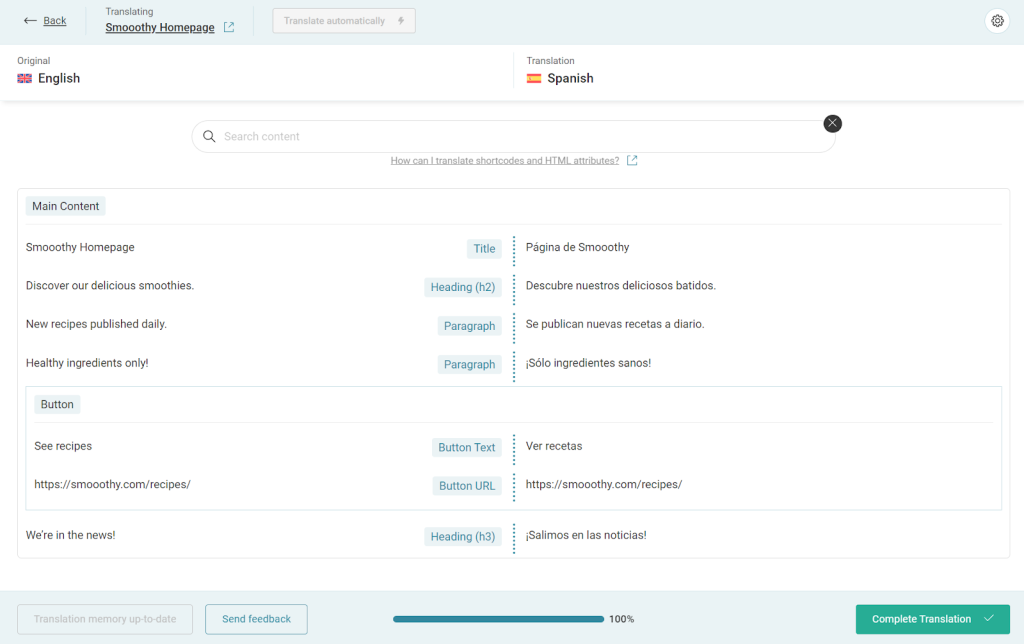
Once you publish translations, they will appear on the front end of your website.
4. Add a Language Switcher
To help your website visitors change to their preferred language, WPML lets you add a language switcher to your website. You can add your switcher in multiple locations on your site, including:
By default, WPML provides a basic design for each language switcher. However, you can add your own styling to match switchers with your website’s design. This includes customizing flags, setting background color, changing font, and more.
Enjoy a Smooth Translation Process
WPML has an ongoing collaboration with over 1,000+ plugins and themes, making sure you enjoy a smooth translation process without any compatibility issues.
Some of our partners include:

Why Translate with WPML?
Since 2011, WPML has helped millions of WordPress users build multilingual websites. As of today, WPML…
- Has over 1,000,000+ annual active installations
- Is compatible with almost every plugin and theme
- Automatically translates 18 billions words per year
And if you’re still not sure, see what our existing clients say about us.
WPML’s features, functionality, consistent updates, and the tremendous amount of behind-the-scenes support set it apart.
James Welch
CIO, Embryo
WPML is a powerful and user-friendly plugin that helps websites translate their WordPress site into multiple languages with ease.
Ben Foster
CEO, SEO Works
WPML has been the most useful plugin by far in our company. Whenever we have a new customer, WPML is our default choice.
Vadim Pavlovich Owner, Coma
Translate WordPress with WPML
Build your multilingual website with the No. 1 WordPress plugin


